Wednesday, 2 December 2015

Cooking Class at Ponsonby School

“No one is born a great cook, one learns by doing.”
― Julia Child
When I offered to take cooking lessons for Beau’s classmates in year zero (new entrants) at Ponsonby Primary, I was a little unsure just how it would go. I have been surprised to see how the children have  loved the experience.
20151030_100019#1
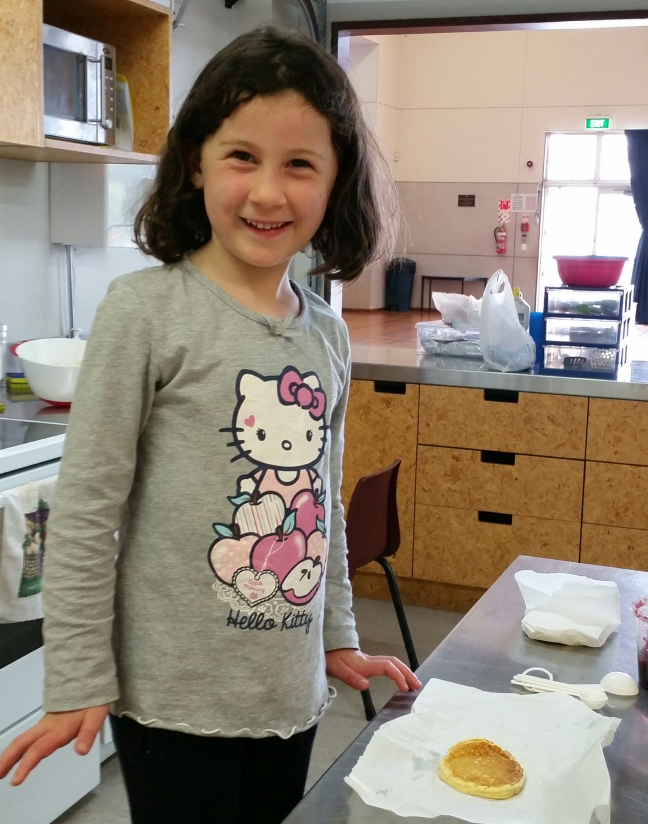
Best of mates – Francesca and Anna look like they could be a future Masterchef duo.
The hour long classes with groups of two or three have been my first go at teaching cooking.  You could say I was diving into the deep end by starting with five year olds. But it has been such a delight. How gratifying it is to see young cooks in the making take such pleasure in making pikelets.
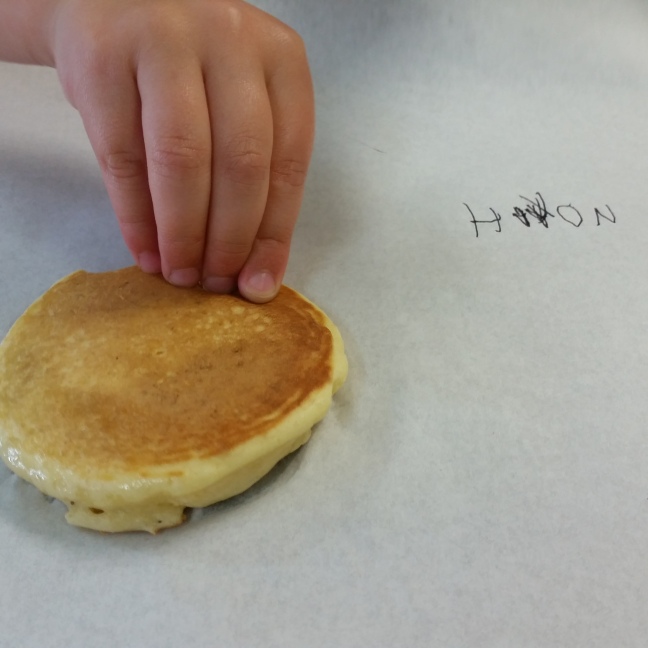
20151023_100615#4
Noah’s pikelet was perfect.
I chose pikelets because they are quick, easy to make and it’s hard to fail. Most children know of or have helped make pancakes before. Pikelets belong to the world wide Pancake family and are Welsh by origin. In England they are called Drop Scones.

Nan’s Pikelets

Ingredients:
1 heaped cup of flour
1 tsp baking soda
2 tsp creme of tartar
pinch of salt
2 Tbsp sugar
1 egg
Milk to mix into a batter*
*Milk Kefir or buttermilk used instead of milk makes an even lighter pikelets.
20151106_090518#1
Jasper and Mia know first thing to do when baking is to wash hands.
Next the flour, salt and raising agents  (baking soda and creme of tartar) are sifted for two reasons: to mix thoroughly and to add air to make the pikelets light.
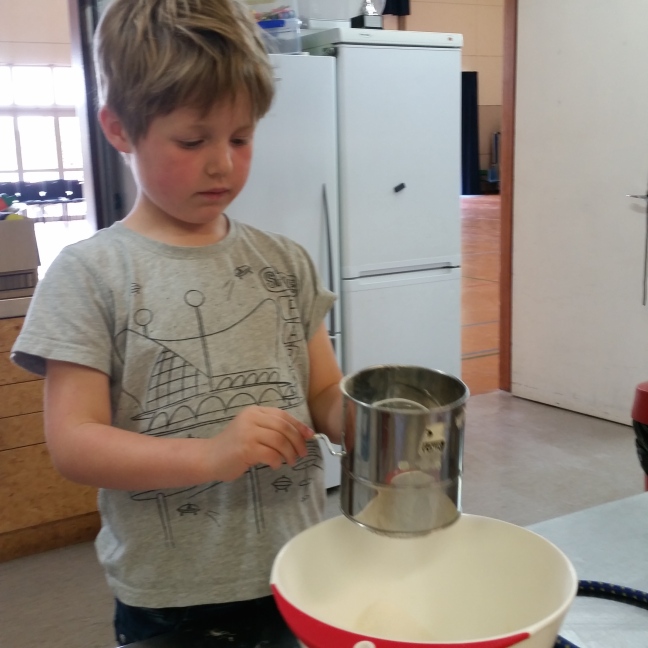
20151103_141051#1
Jack S is doing a good job of getting air through the flour with his sifting action.
Add the sugar and mix through the sifted flour. Make an indentation or well in the flour and break in egg and about half a cup of milk and mix to a batter.
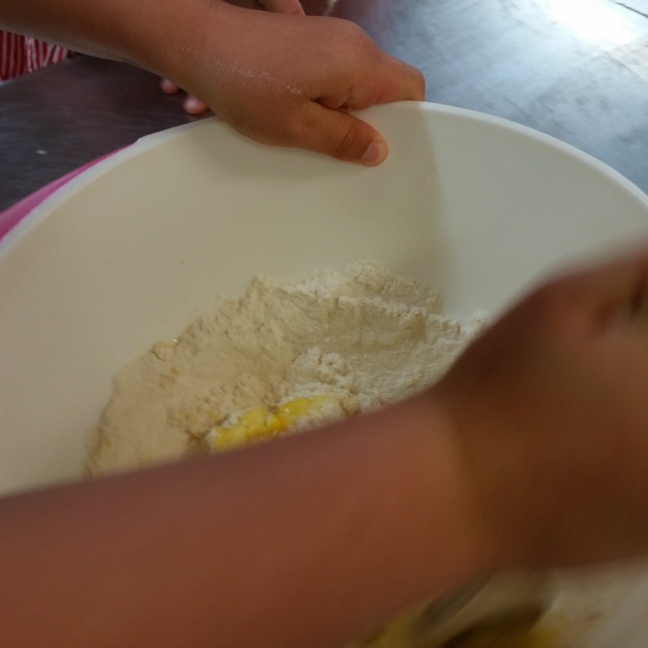
20151106_091252#1
One child would hold the bowl and the other would have a go at stirring. This was to avoid disaster if the bowl and mix hit the floor. Then I would show how to beat holding the bowl in one arm and quickly whipping the batter using a wooden spoon to make a smooth silky batter telling them that this is how to mix once they get bigger.
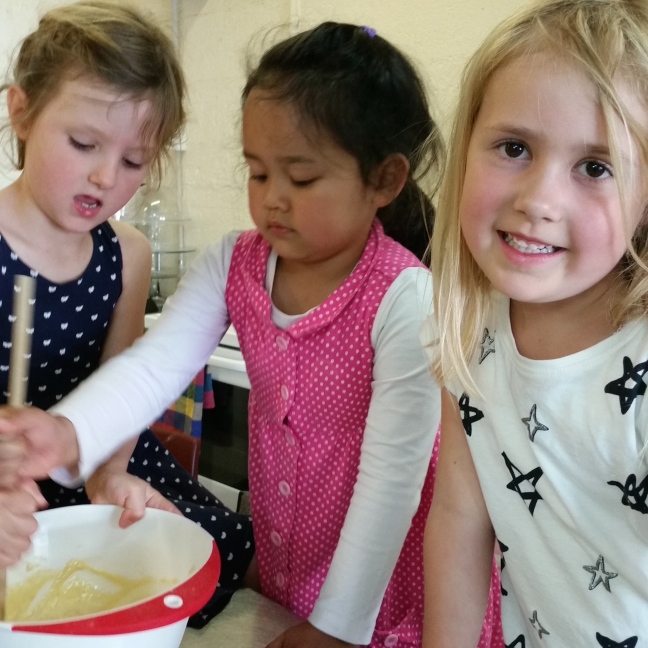
20151027_142305#1
Lucia, Dre and Rebecca all take turns to beat the batter.
Add more milk if necessary to make a consistency that is not too thick as to stay on the spoon or too thin to spread too much in the pan.
2015-11-11 07.22.38
Jack K, Noah and Beau (my grandson) were the first to make the pikelets.
The mix needs to sit for about 10 minutes until bubbles appear in the batter. While we wait for the mix to double I heat up pans. Getting the heat right is the most difficult part of the process.
2015-11-27 15.38.19
Mia is doing a good job keeping the spoon over the centre of the cast iron pan.
It’s best to make pikelets on a cast iron griddle or girdle because its flat plate surface makes flipping a lot easier.  Next best is a cast iron pan.  Cast iron takes longer to reach heat than a steel pain but will produce a more even heat. The pan needs to be sprayed with oil or do it the old fashioned way of a little butter on butter paper and wiping around the pan.
20151023_100610#2
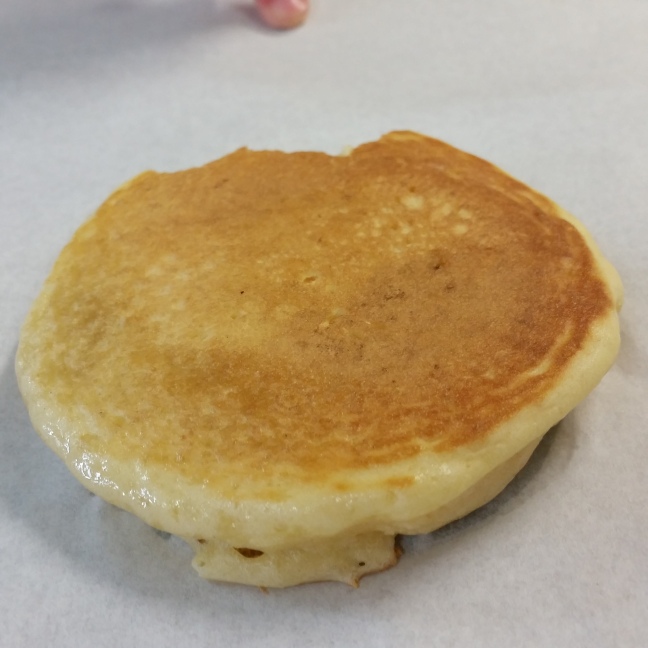
A good pikelet has an even golden colour.
The first pickles we make is a tiny  version to test whether the temperature is right.
20151106_093537#2
Jasper got really good at making neat round pikelets.
You can cook a number of pikelets at once but I felt for our class we should concentrate on one at a time.
We wait until some of the bubbles begin to pop indicating that the mix is cooking and the bottom is browning. Time to flip….
2015-11-20 10.23.42
Cormack experiencing the joy of a good pikelet flip.
I show them first time how to do it, help them flip the next, and then they get to flip on their own.
pic20151127165342
Blake guards his pikelets and is pretty proud of his achievement. His Mum Suzie in the background has been a great help and allowed me to take more children in one session.
20151120_093856
The best part…eating them – Cormack and Spencer

2015-10-28 12.55.44
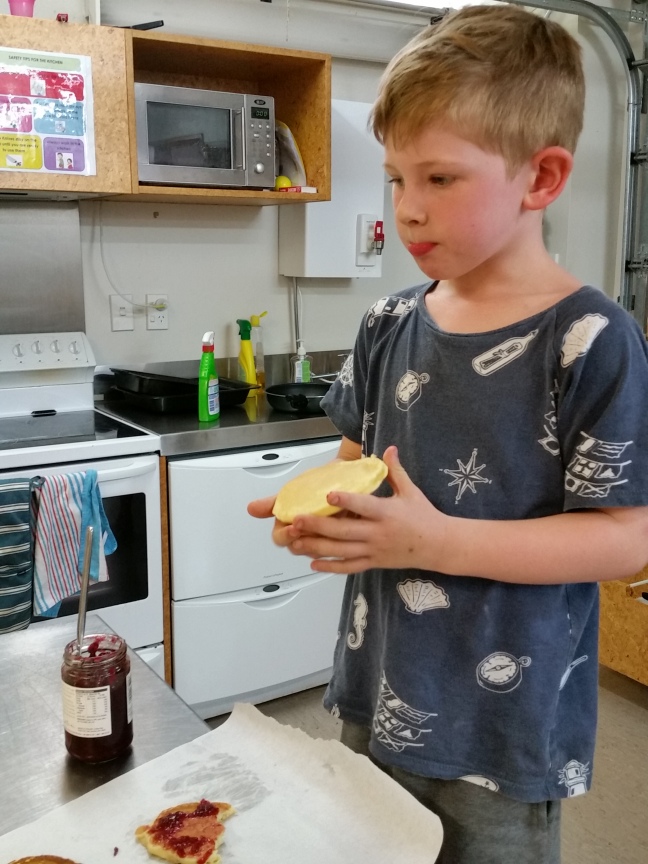
Lucia likes them plain but Rebecca likes raspberry jam
20151124_143837
Hunter wonders if he will put jam on this one too.

20151124_143853
Karishma’s really happy with the end result.

2015-11-27 15.04.08
Julia is wrapping up one to take home.
I found I was fast running out of time. It was decided that on the final Friday I would have six children and make scones for the whole class so they can enjoy sharing food with their classmates. I wanted them to experience that sharing is the most rewarding part of cooking.  Scones are great for a large crowd and we made 36 scones with every child making 6 scones each.
2015-11-27 21.00.30#1
Teacher Mrs Derry allows a sneaky snack break at around 10 for the year zeros. On Friday in Room 20 it was a special sneaky snack break with scones and jam made by their classmates.
Thankfully Susie offered to help and teaching assistant Miss Stevenson made the gluten free scones with Holly and Remy who have gluten allergies.
2015-11-27 21.10.42
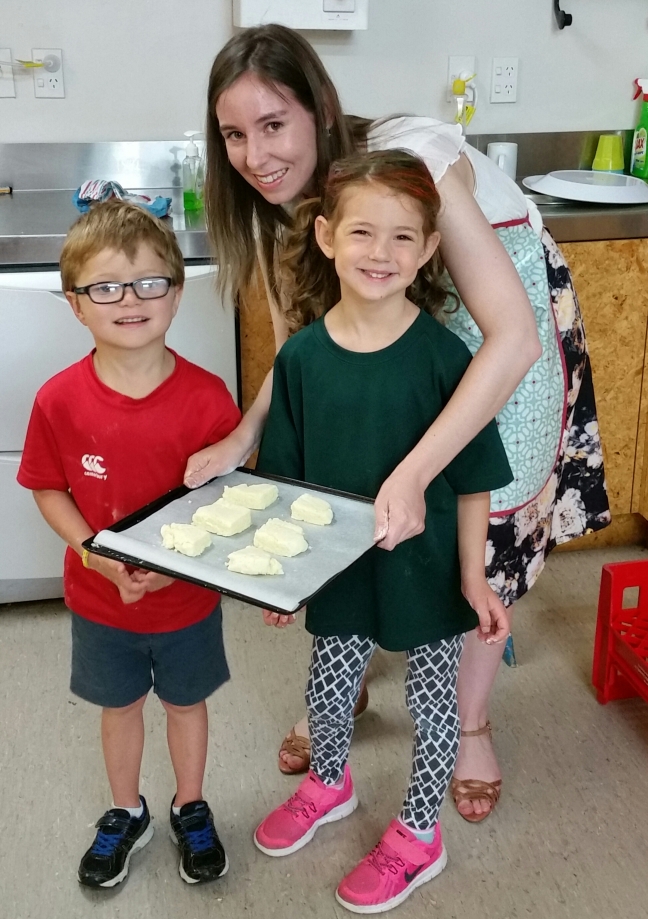
Miss Stevenson with Holly and Remy with their gluten free scones. Its not only the flour that needs to be gluten free so does the baking powder.
I had previously discounted making scones with the children because scones can too easily be overworked resulting in a tough, dry result. I would need to supervise the mixing closely but the rubbing in butter into flour would be fun for the children to experience.
First of all we did the grand hand wash and told them that if they touched their faces they would need to wash again especially because they were using their hands in the mix. Isn’t it always the way, if told not touch your face you suddenly get an itch? The more Jack and Luca thought about it the itchier their noses became. Suzie patiently would go through the washing hands process again and again but they all now know the importance of clean hands when preparing food.

Scones

(Makes 12 – preheat oven to 200ºC)
2 cups of flour (or a mix of 1½ white and ½ wholemeal)
4 levelled off teaspoons of Baking Powder
100 grams of butter
Pinch of salt
*Milk to mix to soft dough – approx 1 cup
Extra flour for patting out and cutting
*Milk Kefir makes fantastic scones as would buttermilk. As kefir is like yoghurt with a tart flavour I usually add 1 tsp of sugar to the flour if using kefir.
2015-11-27 21.13.49
Luca was concentrating hard on the job of shifting the dry ingredients.
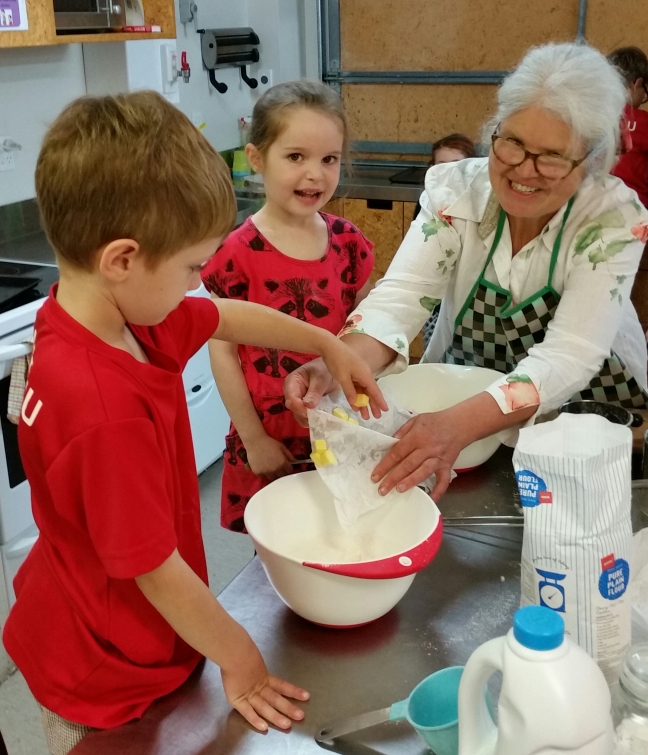
Once the flour, baking powder and salt has been sifted, its time to rub in the butter.  This can be done in a food processor but I find the end result is better if done by hand.
2015-11-27 14.59.42#1
Always use cold butter and dice the butter into 1-2 cm cubes.
2015-11-27 15.01.33
Boris and Olivia enjoyed the squishy squashy feeling of mixing the butter into the flour.
I tend to smear the cubes into the flour and then rub mix between fingers to reduce the butter to a breadcrumbs  consistency. The children worked their bowls of butter and flour beautifully.
The messy part over, they all washed their hands ready for making the dough.
I showed them how to use a table knife to mix in the milk by cutting through the flour rather than stirring.  I just pour the milk rather than measure it out. We mixed until all the flour could form a ball easily.
With scones the mix should be wet rather than dry (wetter than you would for pastry). A light covering of flour on the work surface will ensure they don’t stick.
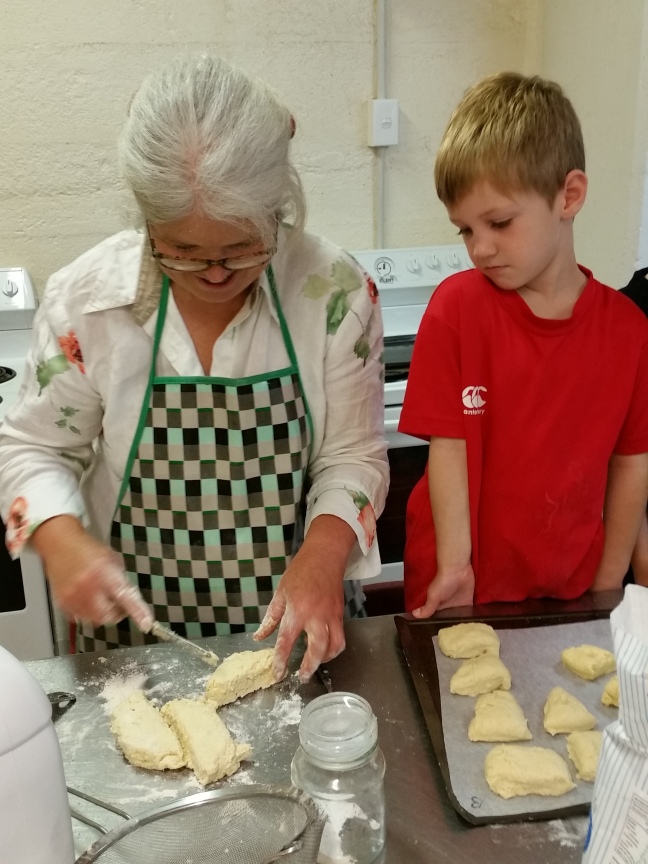
No need to roll just lightly pat down the ball to about 2.5 cm in height and cut into 12 and place on a cold tray either sprinkled with flour or on a sheet of baking paper.
20151127_093542#1
Boris watches me quickly cut the scones because sneaky snack time was fast approaching and we hadn’t got the scones in the oven yet.
Bake for 10-12 minutes –  the smell test is the best timer you can use.  Once you smell them cooking they are usually cooked.
20151127_094206#1
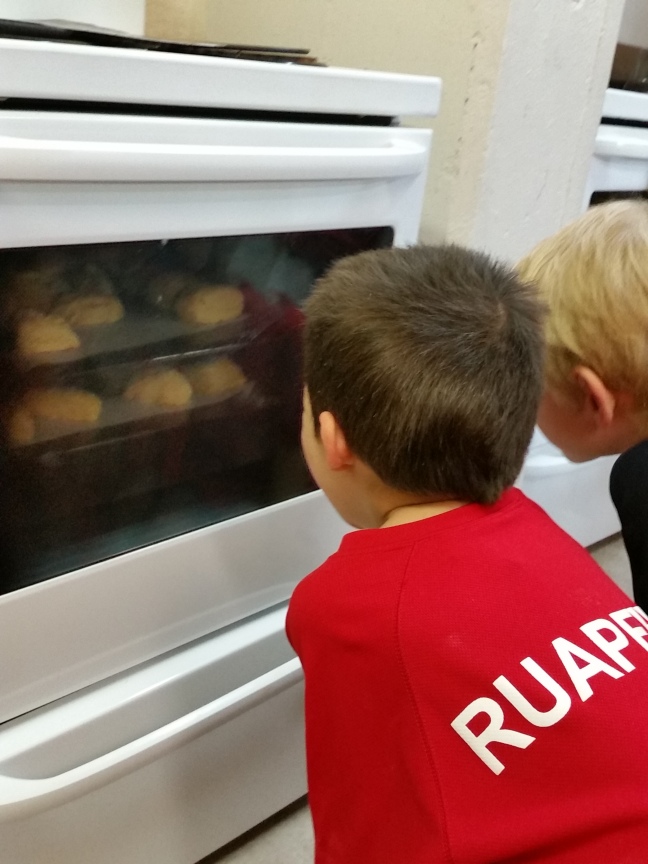
Luca and Jack watch the scones rise and cook.
Out of the oven, the next job was to put butter and jam on the scones to share with the class.
20151127_100247#2
I love this photo of Remy… that first bite into a warm scone with raspberry jam…yum!
One thing these classes have taught me is not to underestimate what  children can do on their own. My final group of six  certainly made great scones and we wrapped up one of their own scones for home.
2015-11-27 11.34.20
Boris, Olivia, Luca, Jack, Holly and Remy all chanting “Scones”.
Children introduced to the enjoyment of cooking something for themselves and their friends will create good food memories that hopefully will inspire them to be creative in their future kitchens.

pic20151128111609

Monday, 23 November 2015

Upcycled Chocolate Peanut Biscuits

Chocolate peanut biscuits from the Edmonds cookbook were the first biscuits I ever made. We used to call them “Peanut Brownies” but that was before the American Brownie was introduced – and the cake-like rich Brownie is a not at all like the crisp peanut biscuits I used to make.
20151102_121219
This is the original recipe.. well nearly original I did add in some raisins with the peanuts.
My friend Sandra gave me a lovely gift of Valrhona – Poudre de cacao (cocoa powder) from France. I was eager to try it out, and chocolate peanut biscuits immediately came to mind, especially as they would be good to pop into Beau’s school lunchbox.
pic20151117063302
Valrhona is called the “Rolls Royce” of the chocolate world and works directly with the cocoa plantations using Fair Trade principles for many years. It is stocked at Sabato Fine Food Company, Auckland and you can order online a host of fine European ingredients. Click on this link to learn more about Valrhona Chocolate.
I  improved the original biscuit by using this beautiful rich cocoa powder – they were delicious. But Beau reminded me that peanuts were not allowed at school because one of his classmates is allergic to nuts.
I needed to find an alternative and discovered another  chocolate biscuit recipe that looked intriguing because it used Spanish paprika and a salty sprinkle on top.  I know salted caramel works, so salted chocolate biscuits might too.
The chocolate biscuit base of my old favourite looked a better recipe so I decided to just change the extra flavourings, and of course use the rich cocoa powder.
20151112_202736
One of these cake racks are a good and cheap investment to help your baking success.

Salted chocolate, raisin and pumpkin seed biscuits

(Preheat the oven to 180ºC and this mix makes two trays)
125 g of butter
1 cup of sugar
1 egg
1½ cups of flour
2 Tbsp of cocoa powder
1 tsp baking powder
½ tsp Spanish smoked paprika (original recipe suggested hot but I used what I had)
Pinch of salt
¾ cup of pumpkin seeds
½ cup of raisins (you could also use Craisins or currants)
½ cup of chocolate chips, chopped pieces, chocolate chunks – (use whatever you have in the pantry)
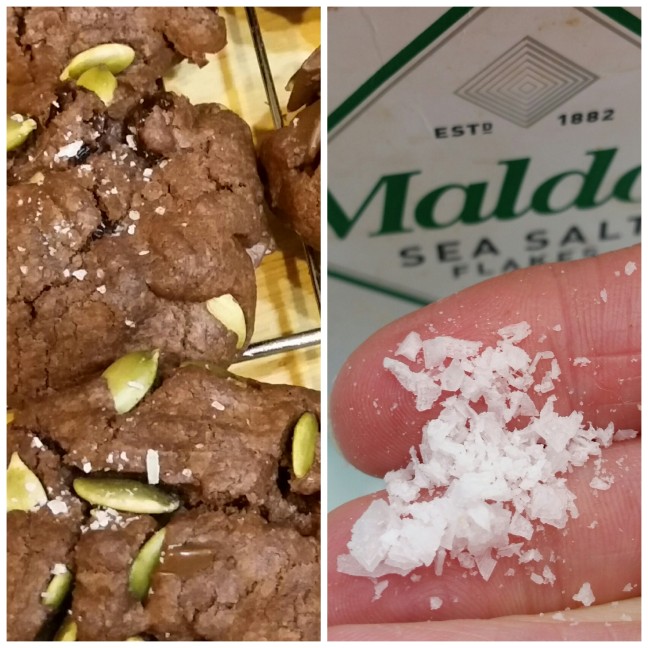
Flaked Sea Salt – I like to use Maldon sea salt because the flakes crush easily
I remember the thrill of using the Kenwood mixer when making those first biscuits and a cake mixer does speed up the process but everything can be made in a bowl with a wooden spoon and a little human energy.
Soften the butter and sugar and beat until its light and creamy, then beat in the egg.
20151119_135842
Sift the flour, cocoa powder, baking powder, pinch of salt, and Spanish paprika and add to the mixer.
20151112_194424
I used the contents of one of the small packets of pumpkin seeds from the supermarket.  It’s important to use fresh seeds to get the most nutritional value and flavour from these mighty seeds.  I have also used sunflower seeds and I’m keen to try Linseed too.
I usually add the pumpkin seeds, raisins and chocolate chunks by hand, but you can use a mixer.
20151116_095637
It’s the first time I have used this type of chocolate pieces and I liked them in the biscuits. They are thin squares.  I snapped each square in half or quarters before adding.
Take a teaspoon full of mix and form into a ball with your hands and place on a tray covered with baking paper.
pic20151119205132
Top left: a teaspoon of mix, Bottom left: rolled into a ball, Right: flattened with a form.
This mix makes two trays and approximately 32 biscuits. Now with a fork dip into a glass of water and gently flatten the balls.  The water helps to prevent the fork from sticking to the mix.
Finally before putting into the oven, pinch flaked sea salt and crush a little over each flattened biscuit – just a little – too much salt and it will spoil the biscuit.
pic20151119093957
It’s difficult to get a really even sprinkle – just rub fingers together and keep them moving over the biscuits.
Place into the oven, first tray slightly above the half way line  of the oven and the second tray as close to half way as possible and bake for 15 minutes or until cooked.  The time will depend on your oven and if using a fan oven reduce the temperature down to 170ºC.  In a non-fan oven half way through cooking swap the trays to get even cooking.   I generally do one tray and pop it into the oven and then do the other so that the first batch can have room to cool on a rack while the others finish cooking.   It’s important to use a cooling rack so that they have plenty of air circulation allowing them to cool quickly and stay crisp.
Alternatively use Spelt flour instead of plain white flour as it produces a better biscuit crunch outcome and some who cannot have wheat products can eat spelt flour products with no side affects.  But it is an expensive choice and I keep my spelt flour for my favourite Wanaka Gingernut biscuits.
Gingernuts with Wanaka bg
I couldn’t pick out the paprika flavour but I think it added to the richness. If you used a hot paprika there would be a little heat…perhaps not advisable for five year old lunch boxes.
Upcycle is a popular word of the moment and usually pertains to art, furniture and building projects where the old fashioned or unwanted materials of are re-used or reworked to gain new value.
20151119_112441
“Daphne at 7” – my sister Kerry is an expert at upcycling. She re-uses animal skulls and blankets to create artworks. The head is a homage to Daphne the goat and will be a whimsical welcome  to her newly established B&B  “7” in Macandrew Bay, Dunedin. The head is mounted on green formica  cut out of a table to fit the bathroom basin.
I think it’s a word that can also be used in the world of cooking as there are many recipes either forgotten or thought not to be exciting enough that with a little rethinking can become an up to date delight.
2015-11-18 22.08.37
The salt you can choose whether or not to add – but it does seem to highlight the flavour of the chocolate.
Not that the classic peanut chocolate biscuit has passed its use by date, but, in these days of higher incidence of food allergies it sometimes pays to upcycle the classic so that everyone can enjoy them.  If you want to make the old favourite just add peanuts and nothing else to the chocolate biscuit base.

Tuesday, 10 November 2015

Whangarei Growers Market and New Zealand spinach


Whangarei Heads is always a delight to visit, so much so that we usually don’t want to leave. But on our last visit our friend Heather Hunt insisted we be on the road by 7am to experience the Whangarei Growers Market held early every Saturday morning.
pic_to_send#2
Microgreens, Keri Keri oranges, duck eggs and entertainers all at the Whangarei Growers Market.
Heather is right, the growers market is excellent.  Of course, coming from the South, my eyes focused first on the large $5 bags of Keri Keri oranges and then a bag of Ben Yen lemons for $2. How I will miss citrus when we move back to Dunedin.
I spoke to a stall holder selling “duck-egg blue” duck eggs.  Half a dozen duck eggs went into my bag as I’m curious to see if using duck eggs rather than hen eggs, will result in a better cake.
Then I spied first of the season golden Butter Beans grown outside by a Keri Keri grower. They were a bit of a treat at $5 a small bag but then to my reckoning growers producing the first for the bean season deserve that extra reward.
pic20151031082638
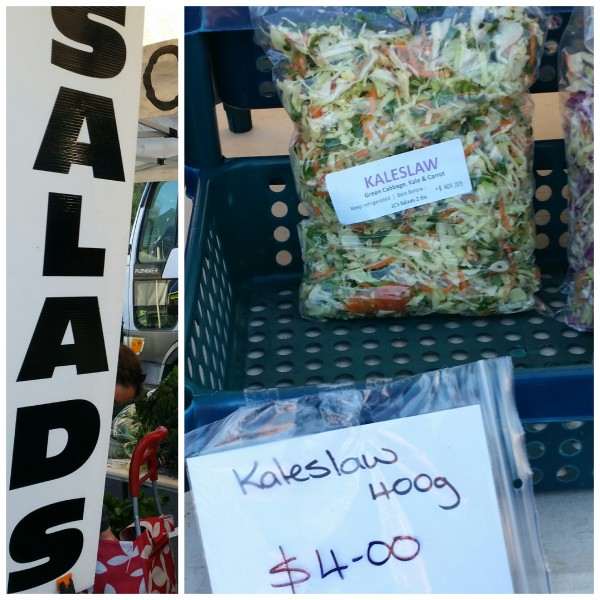
My best contribution to the evening meal would be a salad so I made for the organic veggie stall that also sells ready made salads. Kaleslaw instead of Coleslaw…this made me smile. How smart to incorporate the vegetable of the moment, kale, into a coleslaw mix. It was a vibrant and plentiful stall and a good place to browse while listening to a great version of Leonard Cohen’s “Allelujah” performed by young local musicians.
20150515_104911
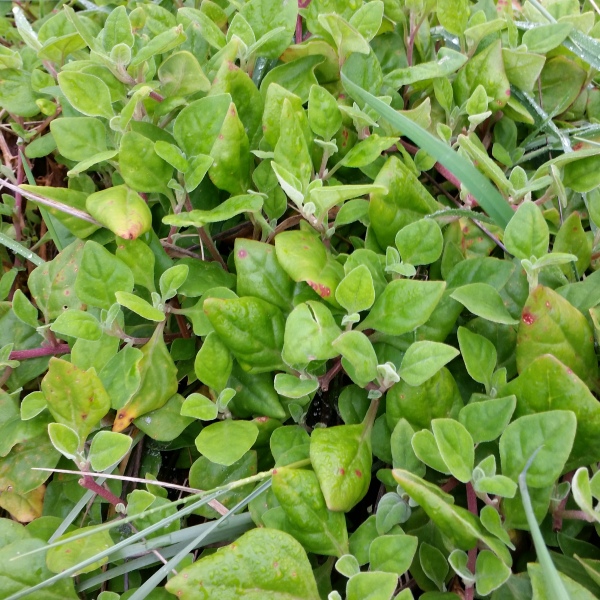
New Zealand Spinach Tetragonia tetragonioides, is also known as Botany Bay spinach, Cook’s cabbage, kōkihi, or sea spinach. These names do indicate that this plant is a native of Australia and New Zealand. This photo was taken at a beach near Farewell Spit, Golden Bay.
It was here I spied the bag of New Zealand Spinach. I’ve never seen this vegetable for sale before although I have foraged for it in it’s natural habitat on sandy dunes and coastal places.  The horticulturally grown plants in the bag had larger and lush leaves compared to those in the wild.
20150503_142152#2
Our neighbouring plotholder, John, at Sanctuary Community Gardens grew really great spinach Spinacia oleracea this winter (May 2015).
New Zealand spinach is not a real spinach but has that similar triangular leaf shape and can be used as a spinach replacement. Its succulent spongy texture will allow it to survive hot and dry conditions, making it an ideal spinach alternative when it’s too hot for real spinach to thrive.
Purple-green Rambo radish micro-greens caught my eye.  This is the first time I have purchased micro-greens. I’m curious about growing them myself so I quizzed the grower.
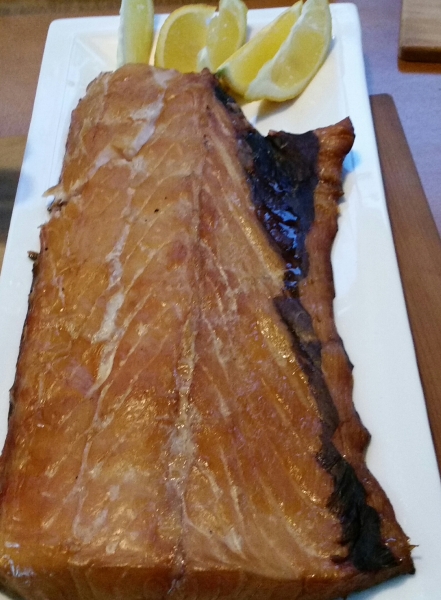
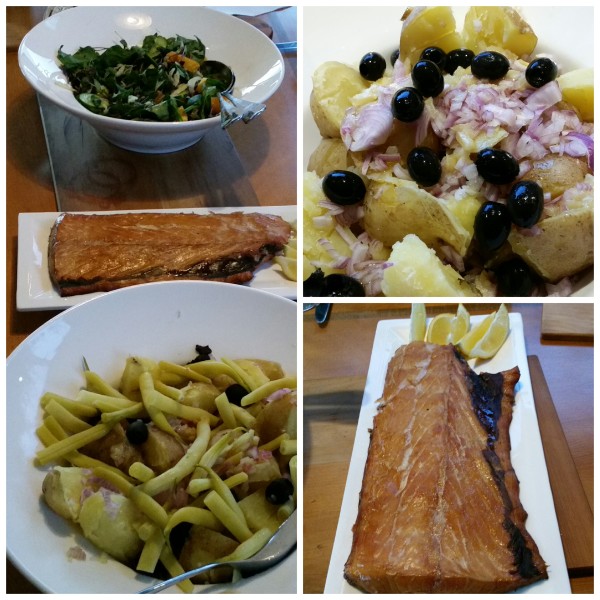
Finally meeting up again with Heather and Peter, we calculated if we would have the ingredients between us to make a quick and easy dinner as we had a big day exploring the Bay of Islands ahead.  Heather had in her bag a side of smoked gem fish and freshly dug potatoes.
2015-11-09 10.55.51
The smoked gem fish was gently heated to serve – easy and simply delicious.
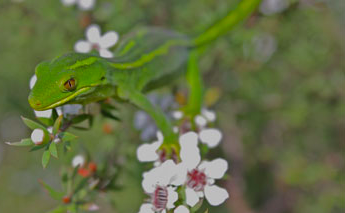
Peter sourced our entree with a camembert from Grinning Gecko cheesemakers,  James and Catherine McNamara. The name of their cheese was inspired by the green geckos that live in the manuka and kanuka on their property at Whangarei Heads.
Screen Shot 2015-11-09 at 10.37.20 am
Ben Barr, another Whangarei Head’s resident, took this photo and could be called a “Geeko”…as there’s nothing he doesn’t know about geckos and is a passionate protector of this little local. We were lucky to have his company along with the remainder of the Grinning Gecko cheese for Sunday lunch at Heather and Martins.
I had more than enough ingredients for a salad and I was keen to try the New Zealand Spinach as the green salad base.
20151031_185404
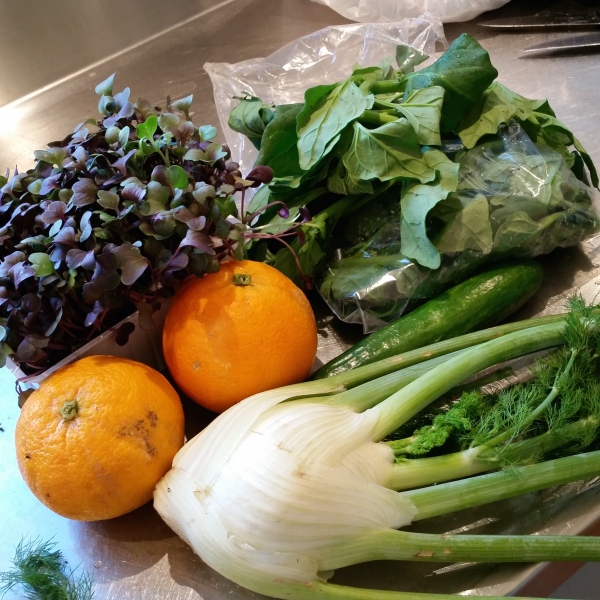
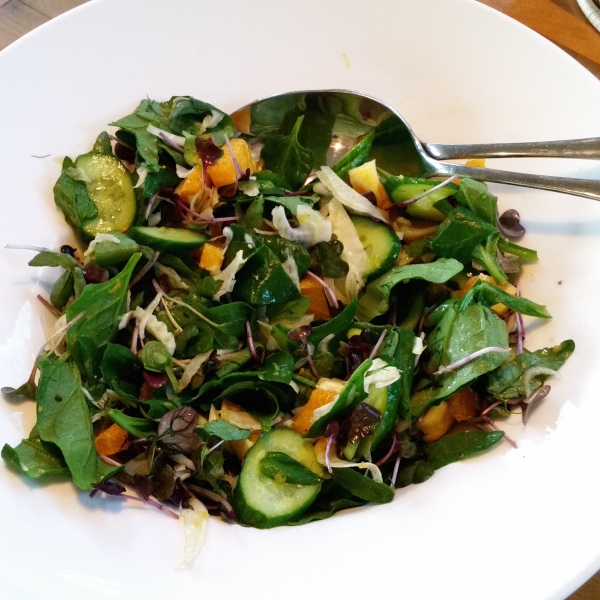
My Whangarei salad would comprise of New Zealand Spinach, Rambo radish micro-greens, Lebanese cucumber, and oranges from the Whangarei Growers market, bulb fennel from my community garden in Auckland and spring onions from Heather’s garden.
New Zealand spinach is high in oxalic acid, like sorrel, so best to avoid eating it raw in large quantities because it can inhibit your body from absorbing other nutrients.  Cooking it will greatly reduce the oxalic acid but will destroy the high vitamin C content.

Whangarei Salad: NZ Spinach, Orange & Fennel

20151031_194013
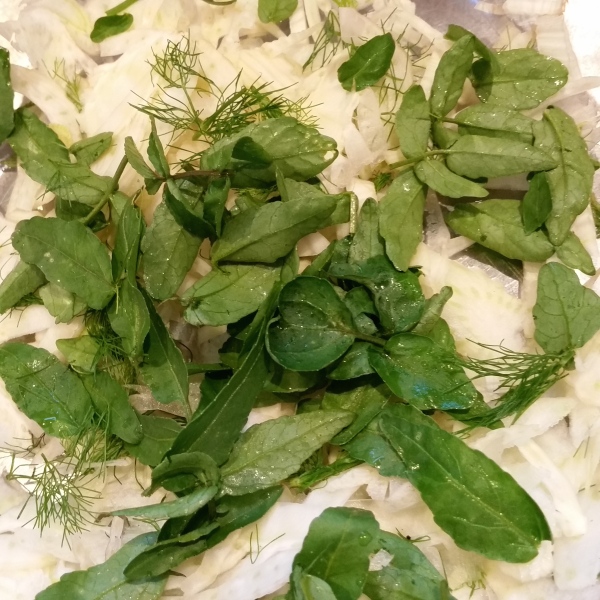
Half of the large fennel bulb I sliced very carefully and thinly with a mandolin and used half of the bag of New Zealand spinach leaves, discarding the larger stems and tearing it into bite sized pieces.
Next I mixed the spinach, sliced fennel, chopped onions and some greenery from the fennel with an orange dressing to be absorbed and softened… as you would with a coleslaw.  Normally with softer leaves or crisp greens I would add the dressing just before serving.
20151031_190740
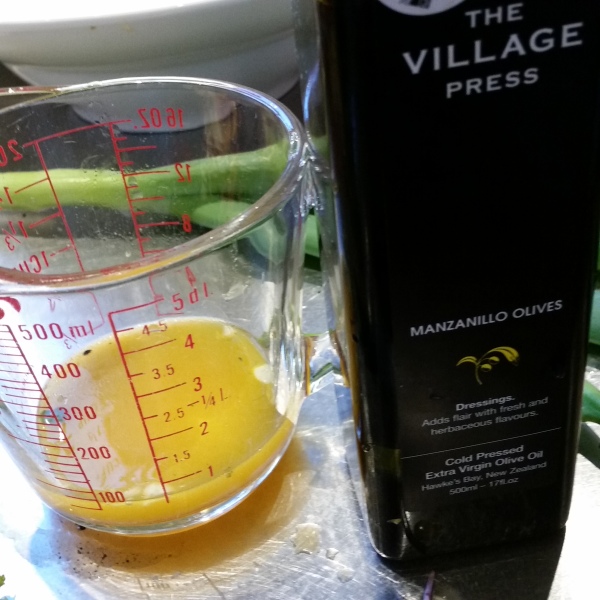
The  sweet orange dressing was made from the juice of a Keri Keri orange, a little orange zest, a garlic clove crushed in sea salt, a dash of cider vinegar,  a teaspoon of honey and a couple of tablespoons of olive oil. I haven’t given exact measurements as the amount of vinegar and honey you add is up to personal taste and relies on how sweet the orange is.  I found when experimenting with this dressing it was best to dip in a leaf of the spinach to check if the dressing was just right for the salad.
20151031_192959
I used two oranges, cutting up the second into pieces to add to the salad along with some chopped almonds. Try to remove all the white pith from the oranges as the pith is bitter.
I added to the marinating salad a sliced up Lebanese cucumber, the Rambo radish sprouts, diced orange and chopped almonds just before serving.
pic20151101102106
To go with the smoked fish and my salad, Heather made a hot potato salad with chopped red onion, preserved lemon, olives and olive oil (see top right). Final touch was to add the new seasons butter beans.
My Whangarei Salad worked really well with the potatoes, beans and smoked fish.
Captain Cook’s crew found that New Zealand spinach was effective at fighting the symptoms of scurvy and harvested, cooked and preserved the leafy plant for the crew of the “Endeavor” (hence the name “Cook’s Cabbage”). But it was another explorer and botanist,  Joseph Banks, who took it back to England to grow in 1772 and it became very popular.
From one explorer to another…
20151031_161141
Heather and Peter enjoying the peaceful Te Waimate Mission at Waimate North, between Paihia and Keri Keri.
Our trip to the Bay of Islands followed the footsteps of another early explorer and naturalist, Charles Darwin. As a young man in his 20’s he made a brief nine day visit to the Bay of Islands in 1835. After the sunshine and friendliness of Tahiti, he was not impressed with a drizzly Christmas in the lawless town of Kororāreka (Russell) and the missionary settlement of Paihia. The highlight of his visit was to the white- washed English settlement and Te Waimate Mission Station.
I wonder if Darwin was served New Zealand spinach during his stay at the mission?
It’s a plant I’m keen to grow under garden conditions as it’s robust, grows well in drought or in coastal saline-rich soils, and is unaffected by bugs or pests. It can also be utilised as a good ground cover to keep moisture in the ground so I am also keen to plant it under fruit trees.
It was greatly appreciated 200+ years ago – I reckon its high time we revived interest in New Zealand spinach.