Saturday 30 November 2013

A Broad Bean Makeover

Our friend Ken proudly showed me a bean seedling in a pot.  Now Ken is a great vegie grower and would not normally be showing me one bean seedling in a pot, but this bean was special.  It has been eagerly watched over and nurtured by his nearly three year old grandson, Hunter. Each time Hunter comes to visit his "Ranads" he eagerly checks how his bean is growing.

Hunter from Christchurch - a gardener in the making beside Ken's
crop of broad beans. Photograph: Ken Rouse
In late spring, asparagus is quickly followed by the arrival of broad beans.  If you are a home gardener the odds are you will have planted the seed in autumn.  The seedlings pop up to encounter whatever winter throws at them, and then with the warmth of spring they race to grow eventually two times the height of young Hunter.

You can plant broad bean seeds in early spring too.  According to European folklore you will have good luck if you plant your broad beans on Good Friday. This translates to early September in New Zealand for a spring sowing or Good Friday for an autumn sowing.

I began growing broad beans because they are an easy bean to grow, especially in the cooler south. Peter was not at all enthusiastic about the beans. His childhood memories of them, like so many others, were of an unappetizing,  greeny-grey bean with a bitter coat that was probably boiled for a good ten minutes. It was time to give this bean's culinary 'bad rap' a makeover.
The orange or red nasturtium is more than a colourful companion
to the beans in the garden, the flower's peppery flavour goes well
with the beans in a salad.
 

I found the solution, thanks to cook and gardener Hugh Fearnley-Whittingstall of River Cottage fame, who introduced me to ways of preparing broad beans that look luscious and taste even better.  And the true test of my success is that Peter now loves broad beans.

Fresh broad beans are bountiful at this time of the year but if you are not growing them they can be hard to find. You probably will have the best luck at a farmer's market.


The secret to avoiding the bitter dry beans of childhood is to pick them young. You can even start harvesting them when they have a girth the size of a pencil.  They can be used simply by cutting pods on an angle and throwing into a stir-fry.  

Once the plants reach the flowering stage, I use the growing tips to add a peppery touch to a salad (a little like rocket in that respect) or these too can be tossed into a leafy stir-fry.

At our community garden a young boy was intrigued with the pods with their fluffy white lining and asked if he could try a bean.  He came back for more and so introduced me to eating them raw - funny I hadn't eaten them raw before.  I have since discovered that in a coastal region of Northern Italy, young broad beans are enjoyed raw as the first of the spring garden produce.


When picking broad beans start at the bottom of the plant
and work up the stem, flick up and snap off the beans. 

Be warned, it does take quite a few bean pods to get enough beans for a meal.   Peter collected a bucket full of beans from our community garden.  And from the bucket the beans minus their pods reduced to this...
As the bean grows in size they tend to grow a thick green-grey coat.  
The much maligned broad bean of our childhood is experiencing a resurgence in popularity and this could be due to the process of skinning the bean. Blogger Nancy Harmon Jenkins  thinks this trend was created in the professional kitchens of France and is not at all necessary.  I will let you decide.


To present a glossy green bean for use in a salad or for hummus I do recommend skinning.  

First of all boil the shelled beans for 3 - 5 minutes depending on size.  As the beans are young at this time of the year they really only 1-2 minutes  but as they grow larger and older they will need the longer time.  To make them cool enough to handle, tip the beans into a sieve and run the cooked beans under a cold tap.

To skin nip the skin at the top of the bean and gently squeeze from the bottom to allow the bean flesh pop out.

In Arabic they are called Foul (pronounced "fool") - for those of you who think broad beans are foul here are three ways to use broad beans that may just change your mind.

Beans and bacon on toast

This is my favourite broad bean dish and it's truly easy and quick. Beans and bacon are a match made in heaven.  The best way to have this dish is to pick the beans and make immediately.  If the beans are young there is no need to do the skinning.   Some broad bean varieties now have a green skin when cooked which is a lot more appetizing than the khaki grey. I usually just skin the larger grey coloured beans.
As I only had a few leftover skinned beans on this occasion I added some
asparagus spears. Beans and asparagus work well together.
First of all fry a little chopped bacon in a heavy based pan - one slice per person - once it starts to colour then add finely chopped garlic, followed by broad beans that have been pre-cooked and skinned  (if required).  Add a squeeze of lemon juice, and season with pepper. 

Both broad beans and  asparagus enjoy the company of mint. So add finely chopped mint at the end of cooking (not too much as mint is a strong flavouring - one set of top leaves in a sprig would do - about 1 tsp finely chopped). 

Toast a good bread and cover with the beans and bacon.  Before serving I drizzle some really good oil - either extra virgin olive oil or avocado oil.  


Broad bean hummus
Hugh Fearnley-Whittingstall's hummus is an ideal use for older beans that are getting floury.  For me it's one of the first dishes I make with the new season's beans because its a way of sharing the fresh harvest with a number of people.   It's a gob smacking green dip that certainly attracts attention and the texture is velvety.

1 to 1 1/2 cups of shelled beans (depends on how many you have on hand)
1/2 to 1 garlic clove (depends on the size and strength of the garlic)
Crush the garlic with a little salt
A generous squeeze of lemon juice (again the quantity will depend on the lemon - add to taste)
About 3 Tbsp of good quality oil like rapeseed or extra virgin olive oil
Add sea salt and black pepper to taste.
(optional) - a sprig of mint finely cut, or a splash of green tabasco sauce or addition of seeded green chilli.

Put the beans, garlic and oil first into a food processor and whizz to a puree. Now add the lemon juice and taste, add more lemon juice if needed, and salt and pepper to taste.

It's important to taste along the way because there are ingredient variations.  The flavour and consistency will depend on the age of the beans and the lemon and garlic can be of varying strengths.  You could add a little green tabasco sauce or chilli if you want to add some heat.   I also like to make it quite garlicky.

A hummus you would think would have tahini included. I think Hugh has excluded it in this recipe to retain the subtle flavour of the beans.  I am keen to experiment and the next time I have only a few beans,  I might opt to make a bean flavoured hummus by simply adding some chickpeas and a small spoon of tahini.

Squished broad beans with preserved lemon and flatbreads

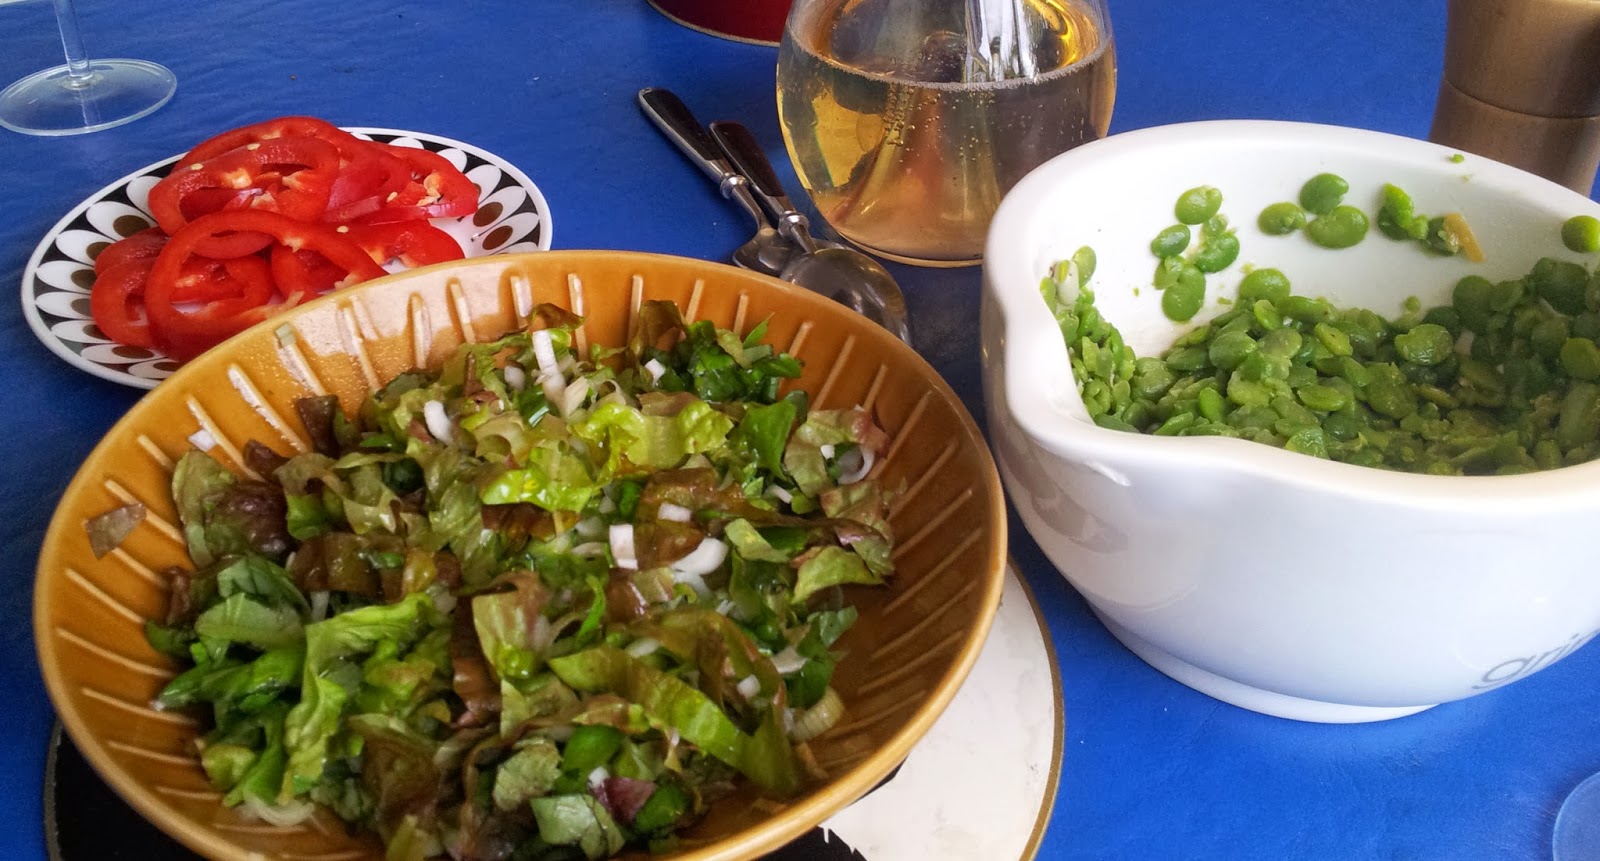
This is a great dish to accompany toasted flat breads and fresh salad ingredients like tomato, lettuce and cucumber yoghurt.  Together they make a simple and quick summer evening meal or lunch.


Mash the beans a little with a potato masher.  They would actually mash a little easier if they still have their skins on.  To the squished beans add a quarter of a preserved lemon , scrape away the flesh and pith of the lemon rind and finely dice.  Alternatively, use a squeeze of lemon juice + zest.  Then add seasoning of pepper (the lemon will add all the salt you will need) and a slurp of good olive oil.

Roti, flatbread or mountain bread are all delicious when cooked with a little oil.  Consider using these  to bring some leftovers to life.  We have this at least once a week and is very useful if you have to get some food on the table quickly. Three year old Beau loves loading up his flatbread triangles.

To cook the flat breads first you need a heavy based pan - caste iron is the best.


I begin by giving it a spray of oil, pop in a flat bread, drizzle oil on top and spread quickly with a brush.  It only takes about 20-30 seconds to cook on one side, flip and cook the underside.

When you flip the bread it will bubble up transforming it from what looks like a piece of cardboard into  a delicous lively looking flat bread.


I thought this bread looked like the surface of the moon.
Cook both sides well and then stack on a plate in a warm oven until ready to serve. 


You can make them into a roll or cut into pieces and create your own combination of topping.

  • Both the fresh or dried broad beans are also well known around the world as Fava Beans
  • To dry, simply leave the beans in their pods to dry and then harvest   
  • Broad beans are high in protein - almost as high as soya beans
  • In Italy some people carry a dried fava bean in their pocket believing that they will never be without the essentials in life.  This tradition came out of hardship. In Sicily when the crops failed, fava beans kept them from starvation.


What other bean can you eat every part of from the growing tips to the dried seeds?  Also called Faba bean, I am now convinced that this most useful bean is a fab vegetable that doesn't need a makeover...they just need less time in the pot and some good companions like mint, lemon, garlic and olive oil.

If you grow the beans inside, remember to harden them off slowly before planting in the soil -
 this may mean taking them in at night and putting them outside in a place that has shade.
Photograph from "Growing Vegetables" The Guardian.com
Hunter has been given a great gift by Ken - a curiousity about the natural world.  Ken in return has been reminded of the magic of gardening through the eyes of his grandson.  Go to it and introduce a child to growing beans!

Wednesday 13 November 2013

The Sanctuary Garden and a Shared Lunch

I had a dream when I left Dunedin for Auckland 9 months ago that I could be part of an urban community garden.  We have finally managed to achieve my dream.  We now have a plot with the Sanctuary Community Organic Garden at UNITEC.  This community garden is a haven for city dwellers who want to be a little more self sufficient and grow their own food.

Peter titled this photo "Somebody's Darling" .  This lettuce was
growing in someones plot - looks too good to eat! 
This tiny bit of self sufficiency gives me a good feeling, especially leaving behind a large food garden in Dunedin to living with one raised bed and herbs in pots in Ponsonby.  We have nick named the community garden as "The Good Life Gardens" re-living the late 1970's comedy "The Good Life".  Peter is not as fanatical as Tom in the TV series, but loves the physical work involved in gardening. For me, it is a chance to share ideas and learn from local gardeners about what to plant and when ... and how to deal with a host of pests we just don't have down south.

Our Community Garden is nestled in the 55 hectare grounds of UNITEC Institute of Technology,
Mt Albert, where it was originally set up as a Horticultural Organic Teaching Garden
The gardeners tell us the volcanic soil here in Mt Albert is some of the best in New Zealand (certainly the free loam is a change from the clay in Dunedin). The soil has also benefited from being an organic garden for over 15 years.
Left: our plot chest high with lupins planted thankfully by the previous plot holders
Centre: Peter cut down all the weeds and lupins in true Permaculture style;
Right: a week later the weeds have all died down and I planted a row of carrots, sheltering
them under nasturtium leaves.

We have leased a plot about 4 x 4 metres amid the other family plots and the large communal beds of garlic, potatoes, silver beet and broad beans, plus beds of perennial herbs.
A very healthy potato patch.
 The Blues Rugby Development Squad trains in the UNITEC grounds.  They recently volunteered to earth up
all our potatoes...  and this should ensure we get a bumper crop. 

One of the founding members of the Sanctuary Trust was a Permaculturalist who planted up a food forest around the edge of the garden.  Beyond that is a forest reserve so it's a perfectly sheltered site.

Permaculture is a philosophy as much as a method of gardening.  It was first introduced to the world by Australian Bill Mollison who studied forest ecology and translated it into a system of growing food and crops in a sustainable way. If you want to know more take a look at A Beginners Guide to Permaculture Gardening, a video made in North London.
Thankfully there are plenty of nasturtium hiding in the
food forest and around the edges of the garden plots
There are small gardens in and around the plots that are planted in flowers to attract beneficial insects.

Just as bees are essential for the success of the gardens, so too are Sarah, Bev and Trevor who organise us all.  There are young and old gardeners, some experienced and others garden rookies.

Being part of the community means promising a couple of hours a month to work on communal spaces.

Grandson Beau loves coming to the gardens, he is
watering flower seedlings planted out on community work day.
After our work, we retire to the large garden shed for a shared lunch around a large a central table.  This is also an opportunity to chat and get to know our fellow gardeners.  As a newbie to the group I felt a little nervous as what I should bring to our first shared lunch. 

 I decided to make Baba Ghanoush and flat bread as this is one of the easiest and nicest ways of eating the gorgeous aubergine.  Plus, as a dip it can go a long way.  Aubergines are abundant and  reasonably priced at this time of year.

Baba Ghanoush


Baba Ghanoush looks a lot more appetising with some freshly
chopped parsley, a slurp of olive oil and a few nasturtiums to bring colour to the dish.
Try popping some Baba Ghanoush into the flower and munch  
You can prepare the aubergine two different ways.  I like to prepare them in halves.  Sprinkle with rock salt, sit for 10 minutes, turn over and knock off salt and place face down on a tray (ideally lined with baking paper).

Cook in a oven at around 170-180C for about 30 minutes, until they begin to wrinkle and 
are soft when you push down with your finger.

In December 2012 I wrote a posting on Aubergine titled
Aubergine/Eggplant-King of Vegetables . Take a look if you want other
recipe ideas for this versatile and healthy vegetable.

I was reminded of a simple and quick way to cook the aubergine for a baba ghanoush by my friend Jan this weekend.  Jan pricked their skins and gave each aubergine a spray with oil before placing them on the hotplate of her compact barbecue, shutting the lid to keep the heat in.

She turned them two or three times and after about 10 minutes took them out and placed them into a brown paper bag until cool.  You can also cook them whole like this in an oven but it will take longer than on a barbecue plate.


The end result whatever way you cook the flesh must be a soft flesh that can easily mash.

I found if soft enough you can mash with a fork. This time I used my latest German made
 kitchen gadget.  It's a whisk that you can push down to make it whirl around
- great for eggs and worked well on the aubergine.

The flesh looks a little like mashed ripe banana (and not particularly appetising yet.)  Next you add 2 Tbsp of Tahini (sesame seed paste). You can replace the tahini with peanut butter or one of Ceres Organics other nut spreads. 

I have discovered that Ceres produces a number of butters made from nuts.
The one in this picture is called ABC - Almond, Brazil and Cashew.
The first time I made baba ghanoush I found the sticky tahini was difficult to disperse through the aubergine, so next time I allowed it to warm a little on the bench and added the juice of half a lemon to make it more liquid.   Finely cut up a clove of garlic and squash with some salt to make the garlic almost liquid and add to the lemon and tahini.  This mix should now easily mix and disperse amongst the mashed aubergine flesh.   Alternatively you can just put the garlic through a garlic crusher.   Taste if it needs extra salt, pepper, garlic, or something else...

If you want it more creamy you could add in some thick yoghurt.

If you want more of lemon zing, you could add more lemon juice and even a preserved lemon quarter, scraped and finely chopped.

If you want more middle eastern heat then add some harissa paste.

I used chopped up parsley but coriander with a little mint is also a great option. 

It's truly simple to make, but remember to taste as you go.  Always add a little of any added flavour at a time.  You don't want to overpower your dip with too many flavours.   

Aubergine is the perfect carrier of flavours, so why not give it a go. Experiment to find your own take on Baba Ghanoush.  My version was a huge hit at the shared lunch.


As the weather warms baba ghanoush can be part of a lovely lunch or light dinner if you add salad vegetables and toasted flatbreads.   Tomatoes go particularly well with baba ghanoush.  

You may be able to just see the line of the carrots I planted (far left)
Our patch has lots of calendulas seeding and one of the gardeners
gave us some lettuce seedlings which are progressing well (right)
Back in our patch everything is shooting up - weeds as quickly as the seeds we have
planted.  We have had some failures but I have a strike of carrots!  We are going to try to keep
our patch in true permaculture style, by pulling the weeds and laying them down to eventually become part of the soil.  We hope this will also help to keep the moisture in as we only visit the gardens once or twice a week. We do take out the invasive weeds.  They are put into the community large plastic tanks with water to rot down and to be returned to the land as a tea.
Beau loves to help and here Poppa Pete is teaching
him how to gently water the seedlings in the greenhouse
There are not many community gardens that also have a large greenhouse in which to raise seeds.
I am doing an experiment to see which of my basil seedlings do best, the ones at home or those at the gardens.  The basil at the "Good Life" gardens will have a good start in the greenhouse.

Monday 4 November 2013

Bring a Plate... a Savoury Idea


"Bring a plate" is a kiwi food sharing custom ...and for those with great baking skills, an opportunity to shine in your community. When I grew up, most gatherings were catered by "bring a plate".  Tressle tables groaned with club sandwiches, sausage rolls, slices, pavlova and some gloriously high rise sponge cakes.

My Mum would normally contribute something savoury as she knew she couldn't compete on the sponge cake front.  Besides, she would say "There'll be too many sweet things and not enough savoury". She was usually right.
Beetroot and Walnut hummus is from Hugh
Fearnley-Whittingstall's "River Cottage Everyday"

At a recent workplace birthday celebration we were all to "bring a plate". I decided, like my Mum, I would contribute something savoury.... Beetroot and Walnut Hummus.   To my delight and surprise the hummus disappeared faster than the cakes!

Its glorious colour and the earthy sweet taste of beetroot makes for a dip that is not at all "run of the mill".  The true test of it's success...everyone wants the recipe.

Beetroot and walnuts get the headline but another important ingredient in this recipe is the roasted cumin seeds.
"Aside from their shared earthiness, beetroot and cumin couldnt be more different. The sweetness of beetroot is enlivened by cumin's smoky citric edge." Niki Segnit "The Flavour Thesaurus".

Beetroot and Walnut Hummus

200 g beetroot cooked (you can use canned beetroot but not pickled)
1 Tbsp cumin seeds
50g walnuts
25g stale bread, crusts removed OR 2 Tbsp of couscous
1 Tbsp tahini (sesame seed paste)
1 large garlic clove, crushed
Juice of 1 lemon
Salt and pepper
A little olive or good vegetable oil (optional)

First cook your beetroot.  I like to wrap washed beetroot in foil and bake in the oven (about 180 C)  until you can easily put a scewer through the beetroot. Once cooled you should be able to easily push the skin away from the cooked beetroot flesh.
 200 g of beetroot is equivalent to a beetroot the size of a grapefruit.
The cooking of the beetroot can be done at an earlier time and after
skinning covered and kept in the fridge.
Next toast 1 Tbsp of cumin seeds in a small frypan over medium heat.  Shake the pan constantly until they begin to darken.  A sign that they are done is the release of their aroma. It will take less than a minute.  Crush the dry fried seeds with a mortar and pestle ... or use a coffee grinder to make short work of it.  You don't need to roast your own seeds, you can just use ground cumin, but there is nothing quite like freshly ground cumin and a little extra effort will reward you with extra flavour.
I use a coffee grinder that is just for spices - you wouldn't want
to do this in the grinder you use for coffee beans unless you want
coffee flavoured cumin or cumin flavoured coffee!!
Now spread the walnuts on a baking tray and toast in an oven 180 C for 5-7 minutes, until fragrant.

If you have time, give your walnuts a good long soak in water
before roasting as this will make the nuts sweeter and more digestible.

Break the bread into small chunks and put in a food processor with the walnuts.

I didn't have any old bread so I tried using couscous instead and it worked really well. I used 2 Tbsp of dry couscous and added enough boiling water to allow it to expand and soften. If you put in too much water just drain before adding.  I didnt put couscous in with the walnuts but later when I added the beetroot.

For a gluten free beetroot hummus, use some cooked rice or quinoa - or perhaps a few chickpeas. The bread or couscous is simply used as a thickener.

Now add the beetroot (cut into 2-3 cm cubes), the tahini, most of the crushed garlic, (the couscous if using instead of bread) and a good pinch of the cumin, half the lemon juice, a little salt and a good grind of pepper. Blend to a thick paste.
Add caption

Taste the mix and adjust the flavour by adding more cumin,  garlic, lemon, salt and pepper, then blend again until you are happy with it.  If you feel it needs a little oil, add this now.

Refrigerate until required but bring back to room temperature to serve.

This dip is best accompanied by toasted pita bread or flat bread.


Here is a quick spring time lunch idea using the hummus.   I had a small amount of leftover Beetroot and Walnut Hummus.  I had to make it go further so made a platter with toasted pita bread, lettuce sliced with some chopped coriander and onion weed bulbs (but you could use spring onions), grated carrot with a little orange juice and a few fennel seeds with a yoghurt dressing on the side.

When I decided to "bring a plate" of Beetroot and Walnut Hummus to the office birthday morning tea, I didn't realise that both beetroot and walnuts are good for the brain. Nor did I know that beetroot increases stamina and walnuts relieve fatigue.  All good things to offer my office colleagues on a plate... and a great alternative to the many cup cakes and slices on offer.

"Resisting the Call of the Cupcake" an article in the NZ Herald where business columnist 
Dita De Boni looks at eating habits in the office.   The illustration is by Anna Crichton 

But, cupcakes and junk food are not the only health risks to the many of us that have desk jobs.
The Huffington Post  gives six good reasons why we should make a major effort to get up from our desks at regular intervals.

To my horror one of the six reasons is ...sitting increases the size of your bottom!  
"Researchers have found that putting pressure on certain body parts (i.e., your bottom) can produce up to 50 percent more fat than usual."