Showing posts with label Hugh Fearnley-Whittingstall. Show all posts

Monday, 2 November 2015

Almond Pudding Cake for Augustines Apricots

I've been experimenting with my favourite pudding cake recipe to showcase Augustines of Central preserved apricots.
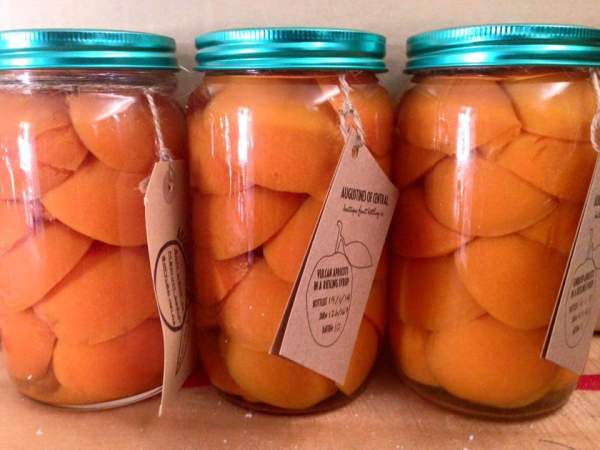
FB_IMG_1436933360943#3
Augustines of Central apricots are stocked in Auckland in the Fine Food section of Auckland's Smith and Caugheys department store.
Our son Gus is the producer of these perfect preserves and he gave me a challenge recently. Could I find a good cake recipe for his apricots? Gus is an excellent chef but really cakes are not his specialty. He was never the one hovering around the cake mixer as a child.  First up I tried a rustic cake recipe from Nigel Slater that Gus suggested.
20150912_182104
It was good sized cake but I felt the apricots were a little lost in the cakeyness.
So I turned to my often used Almond Pudding Cake recipe from Hugh Fearnley-Whittingstall's "River Cottage Everyday". It's a light cake with a higher ratio of fruit to cake.
A pudding cake can be served warm as a pudding or dessert with cream, custard or yoghurt, or cut up cold with a tea or coffee.
20151006_171403#1
The original recipe uses sweet dessert apples that keep their shape. (Cooking apples or tart apples have too much malac acid to keep their shape). I have used pears and they work really well so try some of those sweet Winter Nelis pears featured in my previous post.
20150909_123459#1
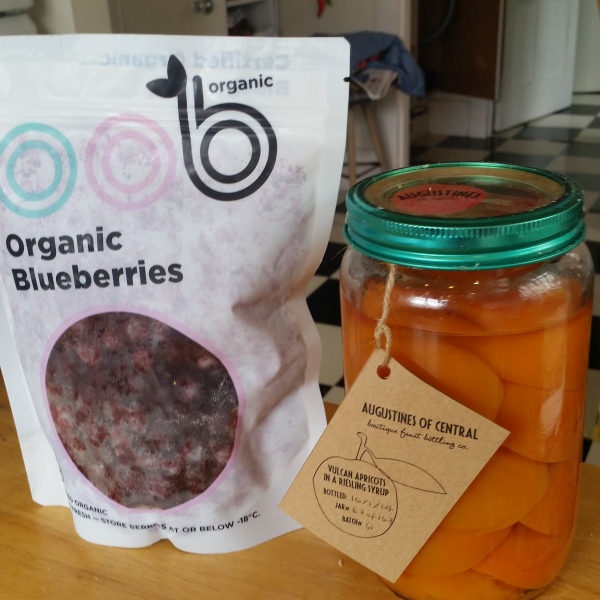
I used OOB organic blueberries from Omaha north of Auckland.
My first experimentation with the Almond Pudding Cake recipe was to use Gus's suggested combination of blueberries and his apricots. I liked this idea for three reasons. First, using two summer fruits preserved in time, one quick frozen and the other in a preserving jar.  Second, using fruits from two ends of New Zealand - north of Auckland for the blueberries and Central Otago for the apricots. Thirdly, the colour combination is gorgeous.
20150912_172304
I decided to make this cake again to take to our community garden's work day shared lunch to get some feedback.
20150924_180659
This time I cut up the apricots to ensure everyone would get some apricot and to make it more like a cake than a pudding.
I got a great response from my fellow gardeners but I felt it didn't really need the blueberries. The apricots could stand on their own. So too could the blueberries work solo as a feature fruit in this Almond Pudding Cake.
20150617_165338

Apricot and Almond Pudding Cake

This cake recipe is for a 20 cm springform cake tin, but as I only have a 22 cm tin so used that. It still works but the cake doesn't reach quite the height it would in a 20cm tin. It comes out a little more like a flan which is fine for a dessert.
Grease your tin and line the base with baking paper and preheat the oven to 170°C.
Ingredients:
150g butter softened
125g caster sugar
2 medium eggs
1 tsp almond essence (optional - if you like extra almond flavour - I prefer not to add this)
75g self-raising flour
75g ground almonds (or blanched almonds whizzed in a food processor - and I have used whole almonds ground into a meal as well)
Pinch of salt
For caramelizing of the fruit:
8-9 Augustines of Central apricot halves
25 g butter
1 heaped tbsp of brown sugar
To save time and effort just place the apricots on top without the caramelising as unlike the apples the apricots are already cooked. But I enjoyed the extra sweetness as the apricots are lovely and tart and the caramel does create a rich coloured crust.
If using other fruits than the apricots like the original apples you will need 3-4 apples or pears, or around 1½ cups of frozen berries.
It's also an option to add a little cinnamon when caramelising the fruit.
Method:
Sift the self raising flour, keeping aside 1 Tbsp of flour and then mix in the ground almond or almond meal. The almond meal is made from whole almonds not blanched ground almonds.
20150912_170000
It's important to beat really well the butter and sugar until the sugar almost melts. The secret is to just soften the butter so that it will cream or fluff up.  If too melted it will become a sugar slurry.  Many a time I have left the bowl in the oven too long.  You can fix this by quickly taking out the butter and sugar from the hot bowl and throw into the freezer for around 10 minutes and then repeat the beating process.
20150912_170909
It's much easier to use a cake mixer, but you can opt for a bit of a workout and beat with a wooden spoon.  Add the eggs one at a time.  To prevent curdling add 1 Tbsp of the flour measurement with the second egg.
This creaming process will ensure your cake is light, as will sifting the flour.
The final step is to fold in the dry ingredients.  It's important you fold rather than stir or beat to keep the mix light and airy.  My little kitchen helper, Beau, filmed me demonstrating this action.
YouTube...click on this link: Beau filming folding flour for cake
Screen Shot 2015-10-28 at 12.39.45 pm
One of the perks helping with baking for Beau is getting the opportunity to lick the mixer.
Spoon the cake evenly into the prepared tin. It's best to start the caramelising while making the cake to ensure the cake goes into the oven quickly.
20150924_180255
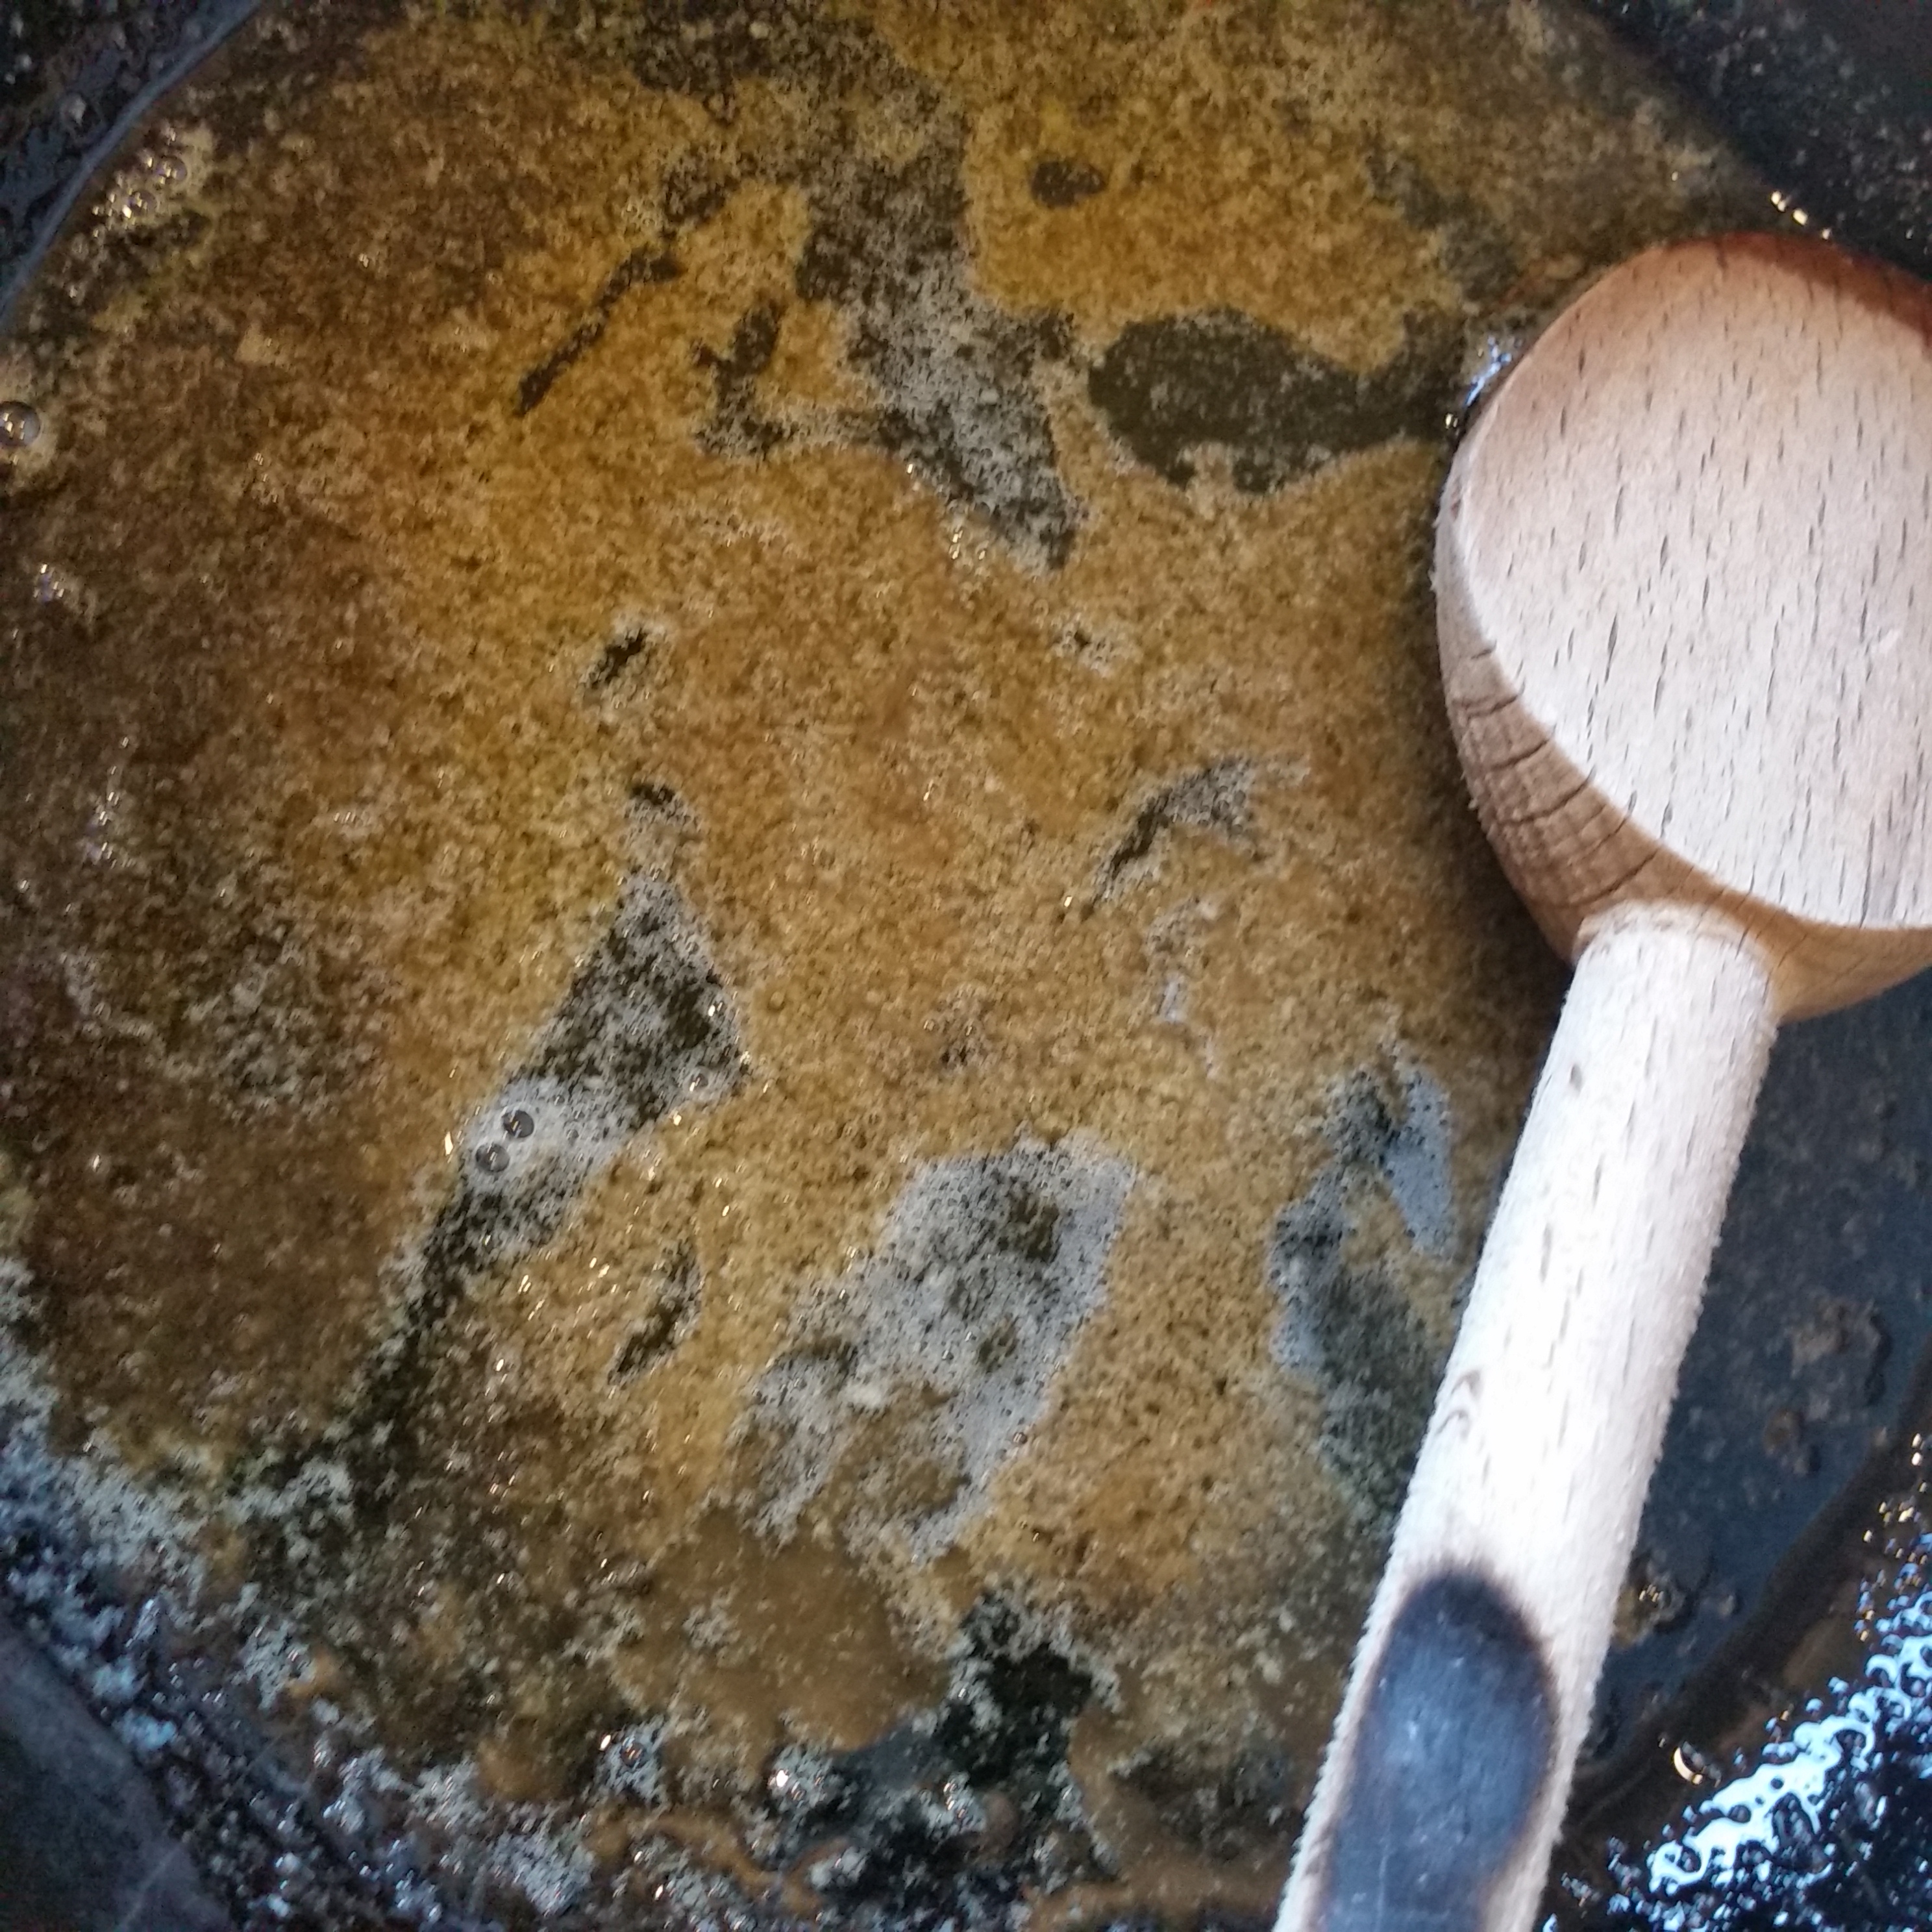
Melt the brown sugar and butter in a heavy pan and let it sizzle to caramelise a little.  Then add your fruit.  I put the apricots cut side down and only for a minute or two. The apples and pears need to partly cook for about 5 minutes. Keep the pan moving so that they don't stick.
20150912_171623
Now it's time to place the fruit on top of the cake mix.
The apple and pears I would do as Hugh suggests and slightly dig them into the cake mix so that they are in the middle of the cake.  I prefer to just place the apricots on top.  The cake will rise around them but it's nicer to see a glimpse of their colour on top of the cake.

Pour over the caramelised juices and bake for around 50 minutes at 170°C.  Be guided by the smell - if you can smell it, the cake is probably getting ready - but to make sure test with a skewer into the centre to see if it comes out clean. Another indication that it's cooked is when it begins to shrink from the edge of the pan.
IMG_3386
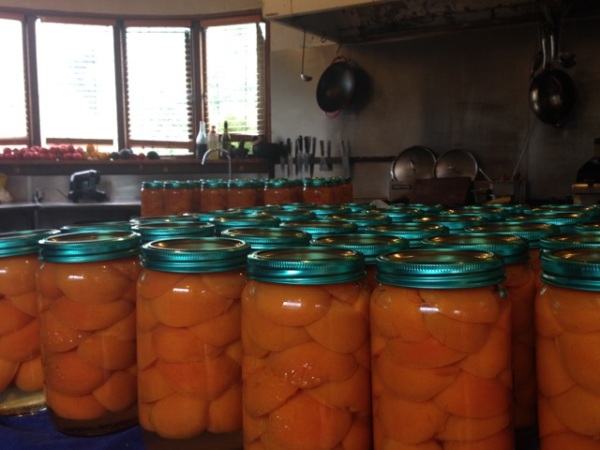
Augustines apricots on the production line.
Preserved apricots contain as much vitamin A, antioxidants and minerals as a fresh apricot  Unripe fruit will only have half the vitamin A compared to a ripe apricot. All of Gus's apricots are tree ripened so by staying on the tree longer Augustines of Central preserves will have maximum vitamin A content.
20140103_161113#1
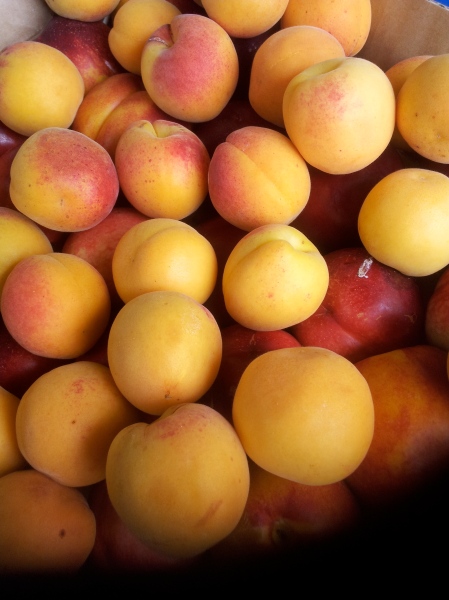
Juicy apricots on top of other stone fruits from Seamans on Basil Road off Meeanee Road, Napier
There is nothing more delicious than a tree ripened apricot and as a fresh fruit it's a low calorie fruit with loads of nutrients including vitamin C and soluble fibre. But it's not easy sourcing sweet fresh apricots.  The best apricots in New Zealand come from Central Otago and Hawkes Bay and to get the best, you need to buy from roadside stalls or the excellent Hawkes Bay Farmers Market in Hastings every Sunday or Otago Farmers Market in Dunedin every Saturday morning over the summer.
Not that most of us have to be persuaded to eat an apricot as they are delicious. But it's interesting that apricots, raw, cooked or dried, are particularly good for improving eyesight especially for those of us with ageing eyes who spend a lot of time in front of screens being exposed to harmful blue light.
I've succeeded in my small challenge to find a cake recipe to complement Gus's preserved apricots. It's also a recipe that will work with any seasonal fruit.  
image3
Photos of Gus preserving pears by Photo by Mickey Ross of Micimage
image4
Gus has a much bigger challenge ahead.  He has to source more Central Otago spray free orchards because his 2015 stock has already sold out and more stockists are lining up to stock Augustines of Central in 2016. 

Thursday, 30 January 2014

Eat ...Nigel Slater's little book of fast food

"Cooking should, surely, be a light hearted, spirited affair, alive with invention, experimentation, appetite and a sense of adventure."  Nigel Slater 

I like to think of the English chefs Nigel Slater and Hugh Fearnley-Whittingstall as my "cooking boyfriends".  They are often with me in the kitchen whether it be following a recipe from one of Hugh's River Cottage cookbooks or an inspirational idea from one of  Nigel's columns on The Guardian website.

Left Hugh Fearnley-Whittingstall at River Cottage and Right Nigel Slater
in his London garden

Both Nigel and Hugh give me great recipes but best of all I like the way they write about food.

Looking at the photos above I realise they do look alike.  They are alike in that they each encourage home cooking using fresh and often home grown produce.

They are different because Hugh lives a country life at River Cottage farm and has actively participated in campaigns to improve the tragic lives of egg laying hens and the chickens who never get to leave a cage, protested at the dumping of fish in the sea and the price of milk in the UK (sounds familiar!).

Whereas Nigel appeals to those of us living in an urban landscape.  How encouraging it is to see the range of vegetables and fruit he can produce in his compact back garden in London.

Nigel's descriptive writing style clearly conveys his passion for food and its infectious. He makes me laugh, especially in his book "Eating for England".

"A beautiful, mysterious thing when seen on the stalk in a foggy field in January, the Brussels sprout has a fairytale look to it...  A pity then that the vegetable shares so many of its attributes with a fart... "

I haven't until now owned a Nigel Slater book. "Eat" was an impulse purchase, sight unseen, simply based on the reviews.  From the moment I opened the package I knew I had a different sort of cookbook in my possession.  It's the size of a novel, with a stunningly simple black title printed onto a rich pumpkin fabric cover.


Who says you can't judge a book by it's cover!   Open "Eat" and you are rewarded with clean, modern design and layout that allows you to easily and quickly read the recipes.

Nigel tells me the book I have in my hand is,
"A little book of straightforward, contemporary recipes, quick or particularly easy to get to the table.  A collection of recipes that are fast, simple and, I hope, fun. " 

The book is divided into 10 chapters with dishes grouped together based on the method of cooking.
In the hand
In a bowl
In the frying pan
On the grill
On the hob
Little stews
In the oven
Under a crust
In a wok
On a plate
And ends with a chapter simply called Puddings.
Each chapter has an intro in a large font, followed by a list of his favourite
dishes for that style of cooking.
Nigel himself best describes the layout,

"The form of the recipes is new.  Written in the style of an extended tweet, they are no dogged '1-2-3' sets of instructions.  The ingredients lists are next to a picture of the finished dish, both at the top of the method so you can see, at a glance what you will need and then, in more detail, within the method"

 The first recipe I tried from "Eat" was rather rich but simply delicious.

 I would normally steer away from this amount of butter and cream...but I was curious and the tag line he puts at the bottom of the recipe intrigued me. "Soft, white, supremely citrus fish"

To give you an idea of how the recipes are presented I copied the recipe just as it is laid out in "Eat".
We enjoyed this creamy fish dish with the new potatoes
gathered from our community garden.  You can follow our
gardening exploits on my other blog Sanctuary Garden Diary
Cod with Lemon, Tarragon and Creme Fraiche
cod, lemons, tarragon, creme fraiche, capers, bay, butter, black peppercorns

Put 350g cod fillet, cut from the thick end of the fish, into a large shallow pan with the juice of 2 lemons and 40g butter.  Chop half a small bunch of tarragon and add to the pan with a bay leaf and 6 black peppercorns.  Bring to the boil, lower the heat, cover with a lid and simmer for about 10 minutes, till the fish is opaque.  Remove the fish with a fish slice and keep warm.

Chop the rest of the bunch of tarragon and add it to the pan with a teaspoon of capers and  3 tablespoons of creme fraiche. The creme fraiche will turn a little grainywhere it meets the lemon juice.  
No matter.  Coarsely flake the fish and spoon the sauce over it.

   For 2: Soft, white, supremely citrus fish.

The butter contributes to the rich flavour of the sauce

This dish would be really good with southern blue cod but as it's not a locally available fish in Auckland I chose Tarakihi,  NZ Seafood's Fish of the Month: January 

The lemon juice and the herb Tarragon is the secret to the success of this dish.  And true to his word it takes only a few minutes to make.

French Tarragon

The not so well known herb French Tarragon gave the dish a subtle hint of aniseed.  I made this recipe in early December when my tarragon was starting to take off.  It was a great way to show how a little tarragon adds to the flavours of fish, lemon and cream. 
This tarragon I took with us from Dunedin in a small pot and it has thankfully
continued to grow in a pot.  Use the younger new leaves to avoid any bitterness.

French Tarragon is a delicate herb to grow.  It hides underground all winter and in early spring small green shoots appear and is ready to harvest early summer.  Tomatoes , eggs, chicken and fish all benefit from the addition of tarragon but it is most commonly used to flavour vinegar and mustards.  Tarragon hates wet feet and enjoys a sandy soil. It requires good drainage so I have had the most success growing it in a pot where I can control the conditions.

The taller growing Russian hasn't the flavour of  French Tarragon.  To test whether you have the right nationality of tarragon simply bite a leaf and keep to the front of your tongue.  A true French Tarragon will numb the tip of your tongue.

I will leave the last word on tarragon to the boys:

"The crowning glory, the whole point of this herb, is as the principal flavour in sauce Béarnaise, the unctuous, egg-yolk rich emollient for steak. (Even though it's the chips I really make it for.) ... But it is with chicken that tarragon reigns supreme. The leaves, especially larger ones, will stand up to the cooking time and gently impart their aniseed notes to the sauce. "  Nigel Slater

"With its aniseedy, liquoricey punch, its slight pepperiness and its hints of pine, tarragon is not something to use with a heavy hand, but in the right quantities and the right company, it can be sublime."  Hugh Fearnley-Whittingstall


One great feature of "Eat" is what Nigel calls "little extras",
"Opposite many of the recipes are ideas that have bounced off them, a scattering of notes, suggestions and narrative recipes that might also interest you".

After returning home rather late from work I was hungry and wanted something fast.  I tried one of his suggested off-shoot ideas, A salsa scramble from the featured recipe Spiced Scrambled Eggs. 

A salsa scramble

Sizzle a finely chopped tomato, a little finely chopped chilli and some chopped spring onion in a little butter, then stir in half a chopped avocado, a squeeze of lime juice and a little coriander.  Use half as the base of the scramble, adding the eggs to it once it is hot.  Serve the other half as a salsa on the side.
We grew this wonderful tomato and its companions basil, tarragon and
spring onion.

This meal took 10 minutes at the most to make.  I started by collecting what ingredients I had to match Nigel's recipe.  Darn only one egg left and the scrambled egg recipe used 5 eggs.  The recipe was made for two though so I knew one egg would work to create a slightly different version of the salsa scramble.   Half an avocado and half a green chilli, although not shown in the photo, I also used.

I didn't have any coriander on hand but have heaps of basil and as tarragon goes well with egg I added a little of that as well.

Another change to Nigel's recipe was to use lime infused olive oil instead of butter as I love olive oil and felt that would better suit the salsa.

As it is cooked very quickly you need to do all the cutting up before you start cooking.  

Only just cook the tomatoes and other vegetables before dividing the salsa into two as you want the salsa portion to be like a salsa, not a sauce.


Drop the egg or eggs into the pot and stir immediately.   Now I knew that this would taste delicious but mix red tomato with yellow egg and the resulting the peach colour looked like something regurgitated.  With more eggs it would look better... but I had a plan.   In another pot I quickly cooked a few summer beans as the colour green does wonders.

Nigel suggests using the remaining salsa as a side.  I decided to top my hot scramble with the lovely red and green salsa.  My resulting dish was more of a scrambled soup because I only used one egg but it didn't matter...it was truly delicious.  I could taste the basil and tarragon, then get a hit of chilli and enjoy the texture of the avocado.  Tomato and egg is a heavenly combination anyway, and it was created in ten minutes!    

Nigel has created this book to reflect the times - we are often time poor.  How easy it is to grab something ready prepared from a takeaway but Nigel is right when he says,

"Making yourself and others something good to eat can be so little trouble and so much pleasure.  And much more satisfying than coming home to a meal in a box".

Thank you Nigel for all the good fast food meals I will make from your little book "EAT".


Saturday, 30 November 2013

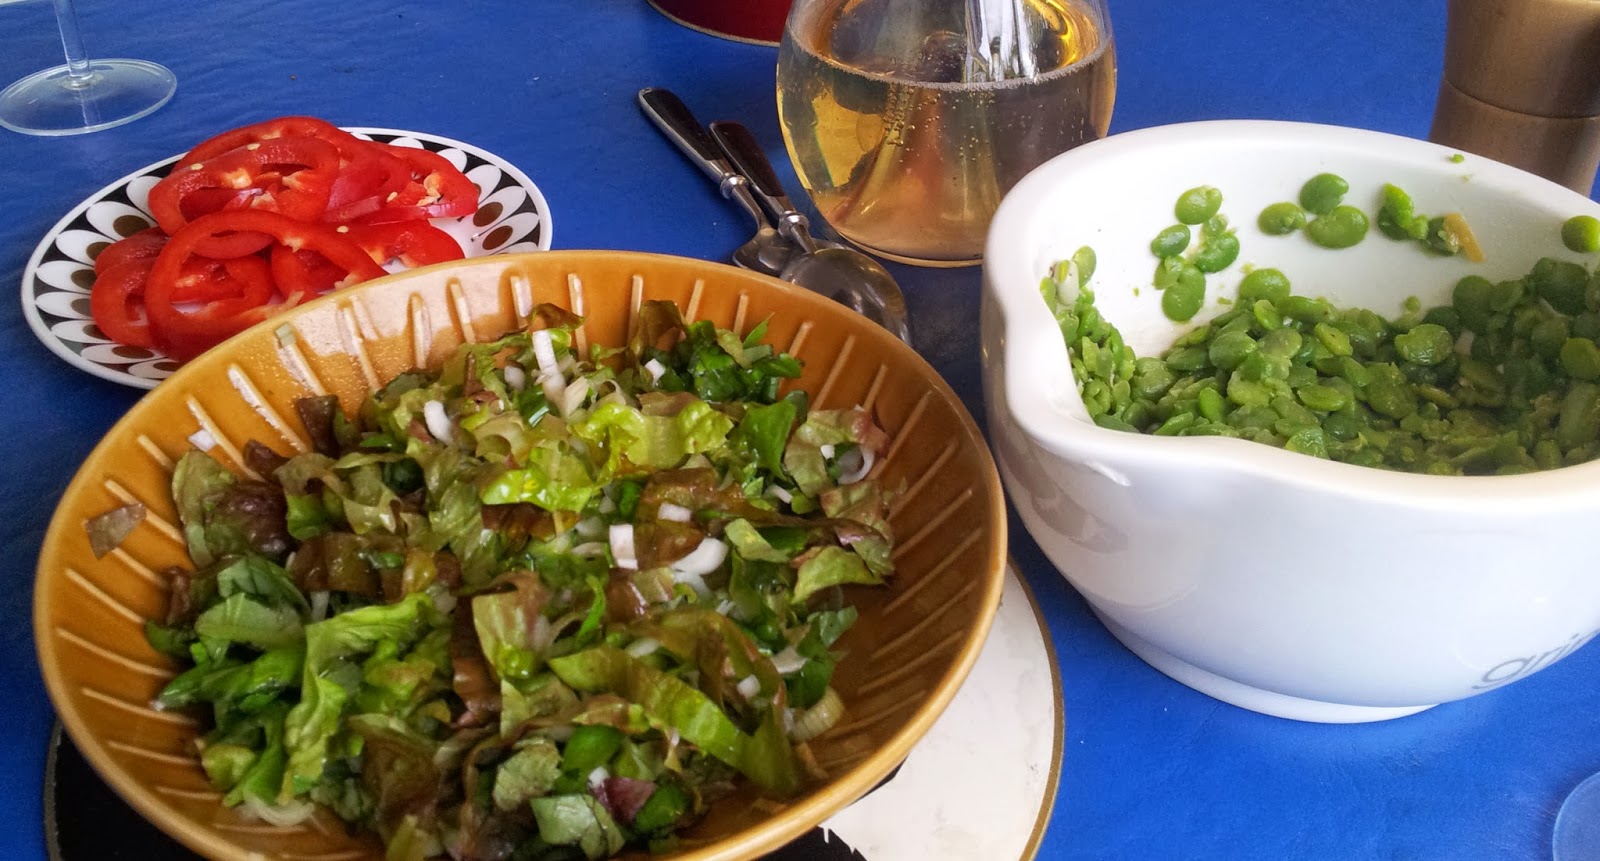
A Broad Bean Makeover

Our friend Ken proudly showed me a bean seedling in a pot.  Now Ken is a great vegie grower and would not normally be showing me one bean seedling in a pot, but this bean was special.  It has been eagerly watched over and nurtured by his nearly three year old grandson, Hunter. Each time Hunter comes to visit his "Ranads" he eagerly checks how his bean is growing.

Hunter from Christchurch - a gardener in the making beside Ken's
crop of broad beans. Photograph: Ken Rouse
In late spring, asparagus is quickly followed by the arrival of broad beans.  If you are a home gardener the odds are you will have planted the seed in autumn.  The seedlings pop up to encounter whatever winter throws at them, and then with the warmth of spring they race to grow eventually two times the height of young Hunter.

You can plant broad bean seeds in early spring too.  According to European folklore you will have good luck if you plant your broad beans on Good Friday. This translates to early September in New Zealand for a spring sowing or Good Friday for an autumn sowing.

I began growing broad beans because they are an easy bean to grow, especially in the cooler south. Peter was not at all enthusiastic about the beans. His childhood memories of them, like so many others, were of an unappetizing,  greeny-grey bean with a bitter coat that was probably boiled for a good ten minutes. It was time to give this bean's culinary 'bad rap' a makeover.
The orange or red nasturtium is more than a colourful companion
to the beans in the garden, the flower's peppery flavour goes well
with the beans in a salad.
 

I found the solution, thanks to cook and gardener Hugh Fearnley-Whittingstall of River Cottage fame, who introduced me to ways of preparing broad beans that look luscious and taste even better.  And the true test of my success is that Peter now loves broad beans.

Fresh broad beans are bountiful at this time of the year but if you are not growing them they can be hard to find. You probably will have the best luck at a farmer's market.


The secret to avoiding the bitter dry beans of childhood is to pick them young. You can even start harvesting them when they have a girth the size of a pencil.  They can be used simply by cutting pods on an angle and throwing into a stir-fry.  

Once the plants reach the flowering stage, I use the growing tips to add a peppery touch to a salad (a little like rocket in that respect) or these too can be tossed into a leafy stir-fry.

At our community garden a young boy was intrigued with the pods with their fluffy white lining and asked if he could try a bean.  He came back for more and so introduced me to eating them raw - funny I hadn't eaten them raw before.  I have since discovered that in a coastal region of Northern Italy, young broad beans are enjoyed raw as the first of the spring garden produce.


When picking broad beans start at the bottom of the plant
and work up the stem, flick up and snap off the beans. 

Be warned, it does take quite a few bean pods to get enough beans for a meal.   Peter collected a bucket full of beans from our community garden.  And from the bucket the beans minus their pods reduced to this...
As the bean grows in size they tend to grow a thick green-grey coat.  
The much maligned broad bean of our childhood is experiencing a resurgence in popularity and this could be due to the process of skinning the bean. Blogger Nancy Harmon Jenkins  thinks this trend was created in the professional kitchens of France and is not at all necessary.  I will let you decide.


To present a glossy green bean for use in a salad or for hummus I do recommend skinning.  

First of all boil the shelled beans for 3 - 5 minutes depending on size.  As the beans are young at this time of the year they really only 1-2 minutes  but as they grow larger and older they will need the longer time.  To make them cool enough to handle, tip the beans into a sieve and run the cooked beans under a cold tap.

To skin nip the skin at the top of the bean and gently squeeze from the bottom to allow the bean flesh pop out.

In Arabic they are called Foul (pronounced "fool") - for those of you who think broad beans are foul here are three ways to use broad beans that may just change your mind.

Beans and bacon on toast

This is my favourite broad bean dish and it's truly easy and quick. Beans and bacon are a match made in heaven.  The best way to have this dish is to pick the beans and make immediately.  If the beans are young there is no need to do the skinning.   Some broad bean varieties now have a green skin when cooked which is a lot more appetizing than the khaki grey. I usually just skin the larger grey coloured beans.
As I only had a few leftover skinned beans on this occasion I added some
asparagus spears. Beans and asparagus work well together.
First of all fry a little chopped bacon in a heavy based pan - one slice per person - once it starts to colour then add finely chopped garlic, followed by broad beans that have been pre-cooked and skinned  (if required).  Add a squeeze of lemon juice, and season with pepper. 

Both broad beans and  asparagus enjoy the company of mint. So add finely chopped mint at the end of cooking (not too much as mint is a strong flavouring - one set of top leaves in a sprig would do - about 1 tsp finely chopped). 

Toast a good bread and cover with the beans and bacon.  Before serving I drizzle some really good oil - either extra virgin olive oil or avocado oil.  


Broad bean hummus
Hugh Fearnley-Whittingstall's hummus is an ideal use for older beans that are getting floury.  For me it's one of the first dishes I make with the new season's beans because its a way of sharing the fresh harvest with a number of people.   It's a gob smacking green dip that certainly attracts attention and the texture is velvety.

1 to 1 1/2 cups of shelled beans (depends on how many you have on hand)
1/2 to 1 garlic clove (depends on the size and strength of the garlic)
Crush the garlic with a little salt
A generous squeeze of lemon juice (again the quantity will depend on the lemon - add to taste)
About 3 Tbsp of good quality oil like rapeseed or extra virgin olive oil
Add sea salt and black pepper to taste.
(optional) - a sprig of mint finely cut, or a splash of green tabasco sauce or addition of seeded green chilli.

Put the beans, garlic and oil first into a food processor and whizz to a puree. Now add the lemon juice and taste, add more lemon juice if needed, and salt and pepper to taste.

It's important to taste along the way because there are ingredient variations.  The flavour and consistency will depend on the age of the beans and the lemon and garlic can be of varying strengths.  You could add a little green tabasco sauce or chilli if you want to add some heat.   I also like to make it quite garlicky.

A hummus you would think would have tahini included. I think Hugh has excluded it in this recipe to retain the subtle flavour of the beans.  I am keen to experiment and the next time I have only a few beans,  I might opt to make a bean flavoured hummus by simply adding some chickpeas and a small spoon of tahini.

Squished broad beans with preserved lemon and flatbreads

This is a great dish to accompany toasted flat breads and fresh salad ingredients like tomato, lettuce and cucumber yoghurt.  Together they make a simple and quick summer evening meal or lunch.


Mash the beans a little with a potato masher.  They would actually mash a little easier if they still have their skins on.  To the squished beans add a quarter of a preserved lemon , scrape away the flesh and pith of the lemon rind and finely dice.  Alternatively, use a squeeze of lemon juice + zest.  Then add seasoning of pepper (the lemon will add all the salt you will need) and a slurp of good olive oil.

Roti, flatbread or mountain bread are all delicious when cooked with a little oil.  Consider using these  to bring some leftovers to life.  We have this at least once a week and is very useful if you have to get some food on the table quickly. Three year old Beau loves loading up his flatbread triangles.

To cook the flat breads first you need a heavy based pan - caste iron is the best.


I begin by giving it a spray of oil, pop in a flat bread, drizzle oil on top and spread quickly with a brush.  It only takes about 20-30 seconds to cook on one side, flip and cook the underside.

When you flip the bread it will bubble up transforming it from what looks like a piece of cardboard into  a delicous lively looking flat bread.


I thought this bread looked like the surface of the moon.
Cook both sides well and then stack on a plate in a warm oven until ready to serve. 


You can make them into a roll or cut into pieces and create your own combination of topping.

  • Both the fresh or dried broad beans are also well known around the world as Fava Beans
  • To dry, simply leave the beans in their pods to dry and then harvest   
  • Broad beans are high in protein - almost as high as soya beans
  • In Italy some people carry a dried fava bean in their pocket believing that they will never be without the essentials in life.  This tradition came out of hardship. In Sicily when the crops failed, fava beans kept them from starvation.


What other bean can you eat every part of from the growing tips to the dried seeds?  Also called Faba bean, I am now convinced that this most useful bean is a fab vegetable that doesn't need a makeover...they just need less time in the pot and some good companions like mint, lemon, garlic and olive oil.

If you grow the beans inside, remember to harden them off slowly before planting in the soil -
 this may mean taking them in at night and putting them outside in a place that has shade.
Photograph from "Growing Vegetables" The Guardian.com
Hunter has been given a great gift by Ken - a curiousity about the natural world.  Ken in return has been reminded of the magic of gardening through the eyes of his grandson.  Go to it and introduce a child to growing beans!

Sunday, 17 February 2013

Lemon Tipple Cake and Urban Composting

 Lemons...yes I am going to post again about lemons!  I'm going to let you into the secret of the best lemon cake ever according to all those that have tasted it - the Lemon Tipple Cake.
Lemon Tipple Cake dressed up for a birthday celebration
decorated with strawberries and icing sugar, borage and nasturtium flowers
It's a mix of two recipes from two of my favourite cooks; Hugh Fearnley-Whittingstall's Lemon Trickle Cake and Lois Daish's Lemon Pound Cake with Gin Syrup.  From Hugh I use the cake recipe as it's a light Victorian sponge and I use Lois's Gin Syrup as the topping because this little tipple makes the cake so delightful.  I have taken the liberty of naming the cake the Lemon Tipple Cake.

Lemon Tipple Cake

This recipe is made in a loaf tin and the lightness of the cake will depend on the quality and quantity of beating.   You can do it by hand but for this cake I prefer to let Ken Wood do the hard work.   Use Ken at full speed to whip the butter and sugar, then add the eggs one at a time.   To avoid curdling add 1 Tbsp of the measured flour after the addition of each egg..and it helps if the eggs are at room temperature.
The butter, sugar and eggs should be beaten until light in colour  as above.  
This  is what makes the cake light.


175 g unsalted butter softened (I don’t always have unsalted butter)
175 g caster sugar
finely grated zest of 3 lemons
3 medium eggs
175g self-rising flour
pinch slat
A splash of milk (optional)

Grease and line a 1 litre capacity loaf tin with baking paper.

Cream butter and sugar until very pale and fluffy (at least 5 or up to10 minutes if you can manage it). 
Add the grated lemon zest and then beat in the eggs one at time, adding a spoonful of the measured flour to avoid curdling.  

Sift the remaining flour and salt into the mixture and fold in lightly using a large metal spoon.   Add a little milk if necessary, to achieve a good dropping consistency – i.e. the mix should drop fairly easily off a spoon when you tap it on the side of the bowl.

Spoon mix into tin, smooth the top gently and put in preheated 170 degrees C oven. 
Bake 45-50 mins or until skewer comes out clean.
With the skewer make holes all over the cake going quite deep but not hitting the bottom.


Gin Syrup - it also works using Tequila or Cointreau - try your own combination

Lois's Gin Syrup: 

juice of 2 juicy lemons
150g caster sugar
2 T gin
(make this syrup while the cake is cooking – just stir to dissolve the sugar no cooking necessary)
Spoon or slowly pour over the hot lemon cake so that the holes can fill up.
The surface of the cake once the syrup has soaked in.

It's a moist yet a light cake.  Does it keep?  Well in my experience it's the sort of cake that doesn't get the chance to hang around. I have had the fortune of having a piece the next day and it was still as good as the day before.
Hugh's original Trickle cake has a runny lemon icing/sauce
of 200g icing sugar and 75ml lemon juice 

Bokashi to the Rescue!

...On the other hand, compost usually does need to hang around for months before it can be used in the garden, but not with the system I have rediscovered.

Living in urban Auckland, space is limited for processing compost, but I still want to make compost for the benefit of my plants in my newly established raised bed.

Our raised bed garden 1 week old - everyone helping out;
daughter Tansy planting out Rocket seedlings and grandson Beau
at the ready with gardening gloves.
Auckland's daily summer temperatures of around 25 degrees give me an incentive to find ways of dealing with food scraps quickly, so as to avoid them mouldering away in smelly bins.

Luckily I had packed my Bokashi bucket when I left Dunedin. Bokashi comes into its own up here.   It's a system of composting that originated in Japan and means "fermentation". One of the best things is after fermenting for 10 days you can give it a shallow burial in the garden and in summer after another 10 days you can begin planting in that soil. 
Not one of my more attractive pictures!
But I wanted to show you what it looks like after being filled over 3 weeks.  
It will be covered  for 2 weeks and then buried in the garden
The environment in the bucket has to be anaerobic (the food is squashed down to squeeze out any air) which usually means in composting terms that it should smell really bad.  But it has an almost sweet fermentation smell about it, rather like it's being pickled.

The juice adds nutrients and good micro-organisms to your garden.  It must be diluted 100:1 (i.e. 2 Tbsp to 5 litres of water) to apply to bare soil.  For foliage dilute to between 1:500 to 1:1000 (1-2 tsp) to 5 litres of water and spray over foliage to form a film over the leaves.  
Juice that gathers in the bottom bucket should be used every 2 days.   The juice  indicates how successful your fermentation is.   It should be a light brown, not smell too pungent and could have a light white mould on top as above.

The fermentation happens because the sweet smelling bran called Zing has been impregnated with good bacteria.  Add a good handful (more in summer or if you have larger quantities of protein to break down) each time you add food scraps.  It's best to collect the scraps into a container and add when full - a 2 litre ice cream container is ideal.  Cut up the material to fit more in the bucket and to hasten the composting process.  Once filled up you leave the bucket closed for two weeks.

I thought I would let The Guardian's columnist Alys Fowler tell you about the next stage....
"What happens in those two weeks is fascinating. Your waste is zombified. It looks pretty much the same, apart from perhaps a little white mould and the whiff of fermentation, but something has happened internally: the good bacteria in the bran have got to work. Much like the undead, it may look similar on the outside, but inside decomposition is well under way."

Here are two other sites with some more information on the Bokashi system: 
The only no no is to put liquids into the buckets and its important to press down the food after each addition to squeeze out the air.

This is something I am keen to try as I intend on growing things in containers.
Zing Bokashi - Using fermented compost in Container Gardening

To set yourself up with a Bokashi bucket and zing it costs around $50-$55.    I now need a second bucket while my other one is fermenting.   I want to see if there is a cheaper way of doing it.
My first homemade attempt at making my own Bokashi Bucket.
Ideally the buckets should be the same size.  Mine aren't but I do like the colours!
I have managed with one bucket with a good fitting lid and drilled holes in the bottom and put it together with a cheaper bucket for holding the juice.   They seem to be working.
When first using the bucket put a good handful of Zing in the bottom.
The original  ZingBokashi bucket is in the background.
But I could do better and am on the look out for some buckets that are larger and stronger and I have a lead... kitchens have lots of buckets with lids and the best thing about this lead is that the plastic will be safe for food.   As Ponsonby Road has lots of kitchens, I will be doing the rounds!


In my previous posting I talked about preserving lemons.   I found my lemons and squeezed as many as I could into this lovely French glass jar I got for free from a second hand store.  I am now prepared for when lemons become scarce.

Preserved lemons with bay leaves and cinnamon sticks
Next weekend I am lucky enough to be invited by friends to go sailing on the Hauraki Gulf.   I will be taking a Lemon Tipple Cake because I imagine any cooking on board will be difficult because of limited space...or will it?