I do have a reason for not posting for a while. I’ve been busy getting to know and experiment with a new food called kefir. I now feel confident after working with it on a daily basis (and even travelling with it) for nearly six months to pass on to you my discoveries about kefir.

Looking after kefir is a little like having a pet. It can’t be left alone for too long and needs regular feeding. It’s quite easy to become a little obsessed about it.
My kefir story starts in December 2014 when I mentioned to my friend Sue that I wanted to introduce more fermented food into our diet. We talked about how foods that have undergone a fermenting process will improve gut health… and it’s widely recognised that the gut plays a vital role in general health. Sue suggested Kefir as a good starting point and next time we met, she gave me some Kefir milk grains. I gladly accepted these grains knowing absolutely nothing about Kefir, but willing to learn.

Kefir (pronounced keh-fear) is a yoghurt like fermented milk product which comprises a mix of probiotic bacteria and yeasts. Unlike yoghurt, kefir has a slight effervescence, which comes from these ‘good guy bugs’ doing fermenting work. In fact the biggest difference between the taste of natural yoghurt and kefir is the slight yeasty smell and taste. I don’t mind the yeasty flavour at all… because I know that these kefir yeasts are ‘friendly’ and wage war on any harmful yeasts hanging out in my gut.

The fundamental difference between yoghurt and kefir is that yoghurt is made up of up of a handful of good bacteria that feed the good bacteria in your digestive tract. But, they are only transient and their benefits will only last 24 hours. Kefir has a mix of transient and colonising good bacteria and yeasts (or probiotics) that continue to keep working in your gut fighting bad bacteria (pathogens), especially in the bowel. The longer you ferment kefir the more astringent and thick it becomes and it will have more probiotics present.

At first I couldn’t easily drink a glass of kefir straight so my first kefir experience was in a kefir smoothie… it was delicious!
Kefir was has been used for well over 2000 years. Marco Polo wrote about it as being part of the diet of the people in the Caucasus mountain region that separates Europe from Asia. Kefir grains were a safe way of preserving milk before refrigeration. It preserved milk by the introduction of 30-60 different probiotic bacteria and it was said those who drank it twice a day lived long, disease free lives. You wonder why it has taken so long for the good news about Kefir’s magical health properties to reach beyond Northern Europe, Russia and Eurasia. Apparently Kefir was only introduced to the United States by Russia at the end of the Cold War.

Unlike yoghurt you don’t need an even heat for the fermentation process. Kefir fermentation is done on the bench top out of the sun. Ideally cover it with a cheesecloth to keep out stray insects… rather than cover with a lid as it’s fermenting gases will accumulate. In the heat of summer I was making kefir in less than 24 hours but now in winter it can take two days.

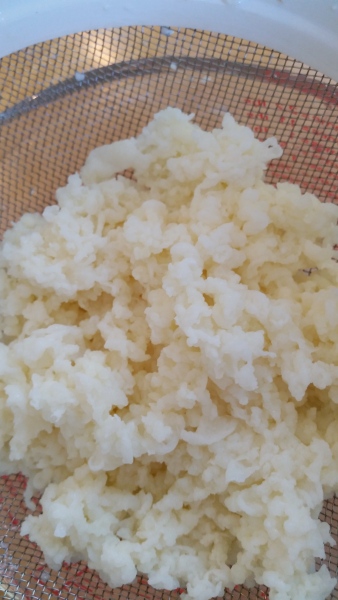
Kefir grains look a bit like rice pudding or cauliflower and the best way to obtain them is from a kefir making friend. Anyone who is making kefir, will have an embarrassment of kefir grains after just a couple of weeks of fermenting. If you don’t know of anyone who can pass them on free then you can find them online in New Zealand at Natural Abundance. Their site has plenty of good information and follow their instructions carefully to activate the grains.

The method I describe below is using activated kefir grains that you might receive from a friend already in a jar with some milk. For each daily ferment, I use about 1 Tbsp of grains to about two cups of milk. This is a lower ratio than some others suggest but I try to avoid the fermentation from being too rapid because I can easily get an oversupply of Kefir.

I use a one litre preserving jar that I fill to just over half way. The good news is you don’t have to be that fussy with measurements when it comes to kefir. As they ferment they increase in volume so it’s good to give kefir a bit of elbow room. I use whole milk as it produces a thicker kefir but any type of milk is fine except for lactose-free milk. The ideal is organic whole milk and you can use goat or sheep milk as well. The kefir feeds on the lactose in milk.. which is good news for anyone who is lactose sensitive or intolerant, in fact for any of us, as lactose can be difficult to digest.
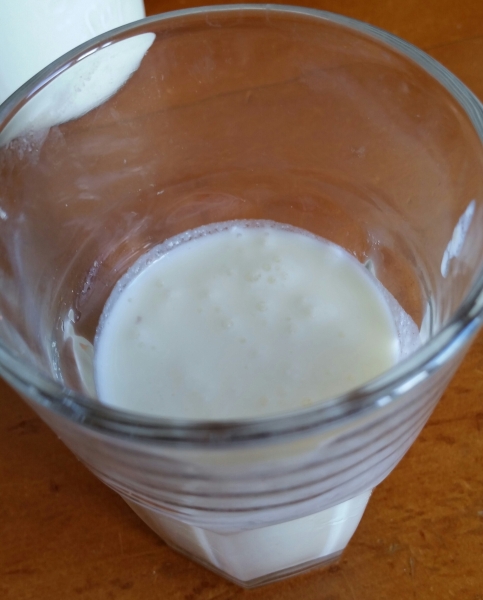
So, here we go. This brew has just begun fermenting.

After 12 hours or so, you will begin to see air spaces in the fermenting milk. This increases until the fermentation is complete, after about 16-24 hours and looks like the picture below.

There will be separation occuring but not enough for the whey to be separated from the curds as below.

There is nothing wrong if your kefir does have separation like above, it will just be less creamy and taste tart. The tartness also indicates that the kefir has eaten more of the milk sugars, so those with a lactose intolerance wanting to try kefir should wait until the whey separates like this before consuming.

Now that your kefir has begun to separate, its time to separate the grains from the thickened fermented milk. Tip out the contents of your jar into a sieve over top of a glass bowl and gently use a non metal spatula or spoon to gently separate the liquid from the grains. What is in the bowl is now processed Kefir and can used right away.
If you want your Kefir with more effervescence and maximum goodness then you can give it a second ferment. This means just leaving the strained kefir out on the bench top for another 6 to 12 hours. This second ferment is not necessary – it’s optional.
Donna Schwenk’s Cultured Food Life video is well worth looking at for extra information and other processes using kefir grains. Donna has quite a few videos on You Tube and if you have food allergies you might like to listen to her story on how her family got rid of allergies through eating fermented or cultured food.

Sometimes I want the curds and whey separated so that I can easily drain off the whey and kept in a bottle in the fridge. Whey can have a number of uses in the kitchen and garden…but that’s another story. The remaining solid can then be sieved to remove the grains and what remains is what I call kefir cream – the consistency of sour cream or thick Greek yoghurt. The cream is easier to work with if I wanted to make a kefir dressing.

When you are away from home your kefir is happy to chill for up to two weeks in your fridge.
If you are away for more than one week you should give it plenty of milk to feed on. Kefir slows down in the cold and once you are home just pop it out on the bench and it will start to activate again.
Another magic feature of kefir is that it can improve your baking. Use kefir where you would use buttermilk in recipes. I used kefir instead of buttermilk in Yotam Ottolenghi’s Skillet Cornbread recipe.

There is a lightness in baking made with kefir so I use it in any recipes that have milk in them. I have tried it with my favourite recipes for scones, oat pancakes and Nan’s pikelets.

A delightful advocate of kefir on You Tube is Katrine Rudolph from Denmark. Katrine milks her own Jersey cow and makes her kefir from raw milk.
Kefir once discovered is something many want to share on You Tube videos. I, too have been most enthusiastic about my new pet subject kefir… perhaps telling friends and family more than they really want to know.
For me kefir has been a wonderful start in my journey to discover more about fermented food.

No comments:
Post a Comment
Would like to see your comments or share some of your favourite recipes.