Saturday, 22 August 2015

Foraging for Jelly

To forage is " to search widely for food or provisions" and a most delicious provision is a glossy jelly. I have miscalculated because this week I opened my last jar of jelly and now I'll have to wait until summer to restock. Until then, I can reflect on jellies past and future. What fruit or berry will I forage this summer/autumn?
20140902_104617
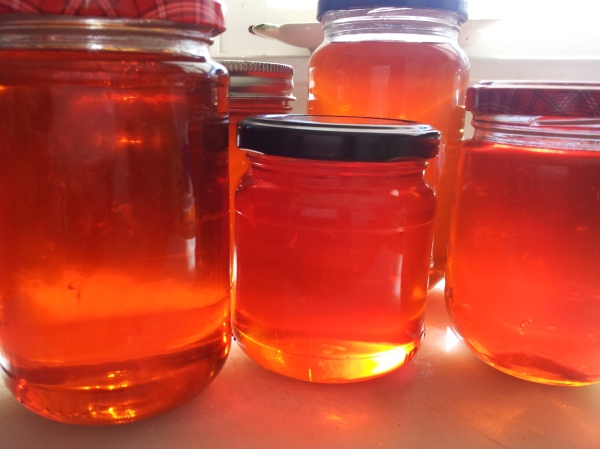
Tejocote Jelly (Mexican Hawthorne) Crataegus gracilior  foraged from Christchurch Botanical Gardens 2014 - a jelly fruit that fruits midwinter.
Making jelly is like any other skill, you just have to do it enough times to get good at it. But it also helps to understand the science of how a jelly sets. There are a few tricks I have learnt over the years and I continue to learn as I experiment each season. To make a few jars of jelly you need lots of fruit. Buying the ingredients is not economic, so to be a real jelly maker you have to learn to forage.
20150521_090817
One of my favourites is crabapple jelly because of it its ruby translucence and it was the first jelly I ever made from foraged crabapples in the Dunedin Botanical Gardens in the 1980's.
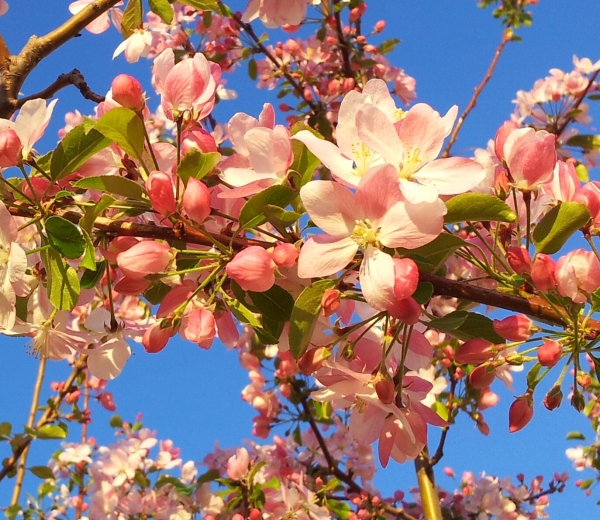
There is a lovely crabapple tree in our neighbourhood. Last October I photograph the tree in blossom, promising myself in autumn I would knock on the door and ask if I could harvest the crabapples. Tony, the tree's owner,  was happy to give me permission to harvest on condition that I gave him a jar of the finished jelly and left some for the birds. I quickly agreed to the terms as I usually do both anyway.
20141020_065606-1
Crabapple Malus trees are worthwhile to have in your garden for the blossom alone. Some varieties flowers are white.
First step is to wash the fruit a few times to get rid of any dirt or dust.
20150519_103212
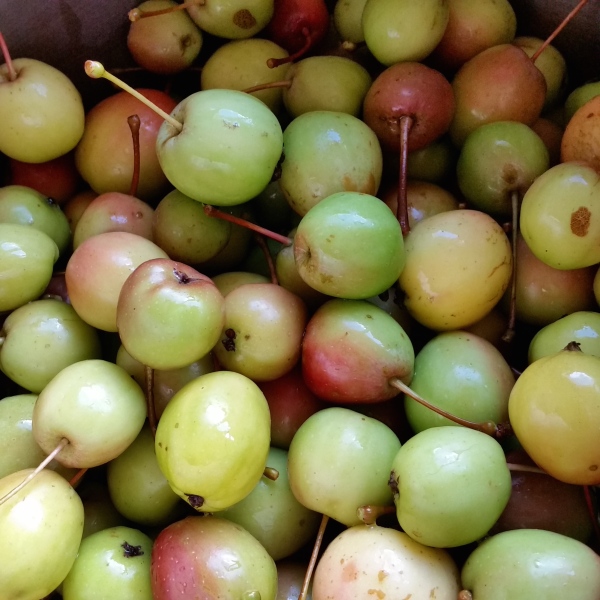
These crabapples are green with patches of red, but more often you will find the miniature apples are yellow or bright red. Whatever their colour, they all turn into the same magical colour when made into a jelly.
Add enough water to just cover fruit and no more.  At this point you can also decide whether to add some spices or to stay with the natural fruit flavour.  I have used cinnamon sticks, bay leaves, kaffir lime leaves, slices of ginger, citrus peel, cardamon, coriander seeds and star anise ...NOT all at once, of course.  Choose what best goes with the type of fruit. I tend to use star anise or cardamon with strong flavoured fruit like plums; use ginger, kaffir lime leaves, and coriander to give a tropical touch and add flavour to subtle fruit like guava; cinnamon works well with apple.  I would recommend working with the natural fruit flavour first and then think about an extra flavour dimension to the jelly when you make it a second time. If you need to add extra acidity to the brew this is the stage you add either a cut up lemon or lemon juice....more on acidity later.
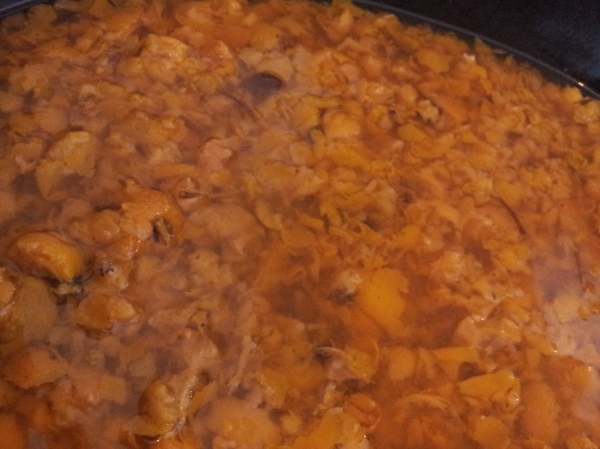
Simmer until fruit becomes soft and mushy and if still in large pieces use a potato masher to break down further.
20140831_143802
Tejocote or Mexican Hawthorn fruit cooked until mushy.
Now it's time to strain the fruit pulp through a jelly bag. No need to buy or even sew a special bag - just a length of muslin or cheese cloth will do.
20130429_073542
I drape the material into a large bowl (a non-metal container) and gently pour in the pulp, gather up the cloth and slowly raise out of the bowl.  The bag has to suspend above the bowl and slowly drip over a day or night.   Most important:  do not be tempted to squeeze the jelly bag as this will make the jelly cloudy.  The easiest way to suspend the bag is in between two chairs with a stick or broom handle.   Tie the bag to the stick with string.  To avoid small pokey fingers or a curious pet from interfering with the brew, I do this stage overnight. I don't waste the remaining pulp.  I tend to put it through a mouli and then use in smoothies or add to porridge.
20150403_100010
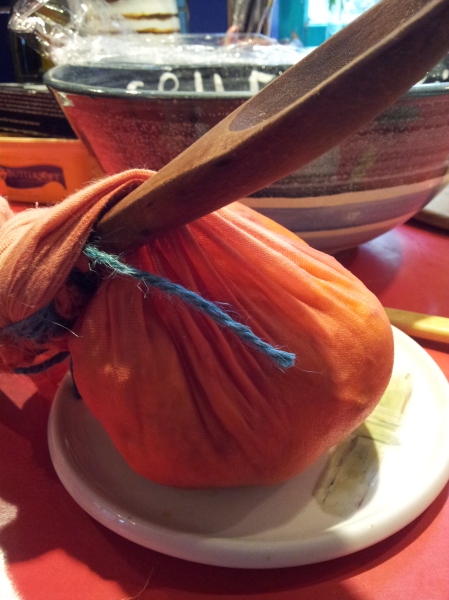
This jelly was a mix of hawthorn Crataegus and wild roadside apples from Kaweku in Southland and quince Cydonia oblonga  from my sister's garden in Dunedin. I only had time to collect a few hawthorn berries so just made a small batch. The added quince was important because the roadside apples weren't that flavourful. The quince would also improve the colour of the jelly.
For a small quantity of fruit you can use a wooden spoon placed over a deep bowl. You may need to keep pouring off the liquid into a jug to ensure the liquid doesn't touch the bag.
20150519_190338
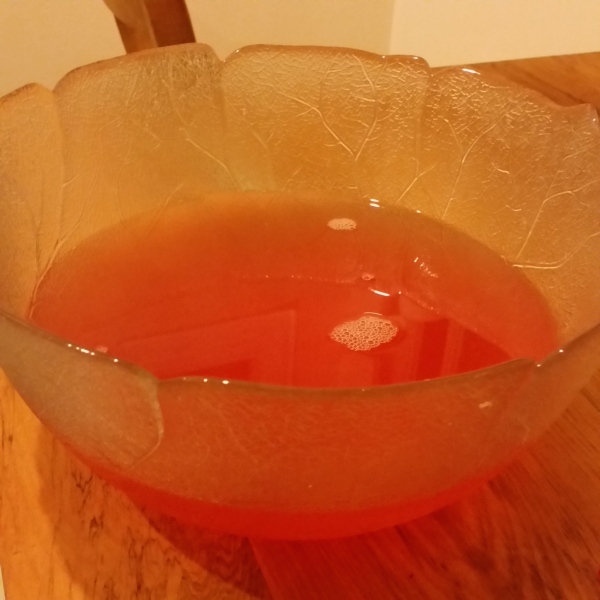
Crabapple juice from the jelly bag already indicating it's final ruby colour.
Measure the strained juice in cups then heat the strained liquid.  For a large quantity of liquid make the jelly in two batches. (I do this because when the sugar is added and starts to bubble, it will greatly increase in volume and the last thing you want or need is overflowing boiling sugar syrup on your stovetop.)
20150403_100001#1
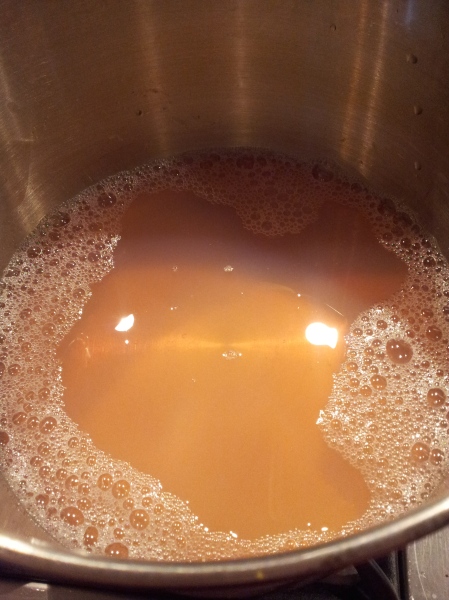
Quince jelly starts out a golden colour and then changes after cooking with sugar to a pinky red.
Now I add the sugar.  A lot of recipes state cup for cup of sugar and syrup.  I find this makes it a little too sweet but it's a fine line - too little sugar and it won't set or keep well.  So my standard is 3/4 cup of sugar to every cup of liquid. Sugar is the preserver in the jelly as harmful micro-organisms cannot survive in water that has 60% or more sugar content.
Keep stirring until the sugar dissolves and once it has reached boiling point, stir every few minutes.
20150403_104658
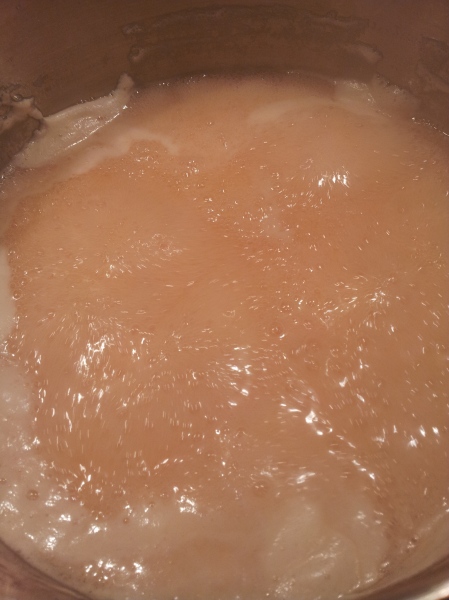
The quince jelly is still a pale colour when beginning a rolling boil but it eventually transforms into the most exquisite coloured jelly.  See my July 2013 posting "Make Cheese" says the Quince for the colour transformation and quince paste (dulce de membrillo).
Deciding when it has boiled enough is the most tricky part of jelly making.  It's actually better to underestimate than to over do the boiling.  If it fails to set you can re-boil it ...but you need to add extra sugar as well.
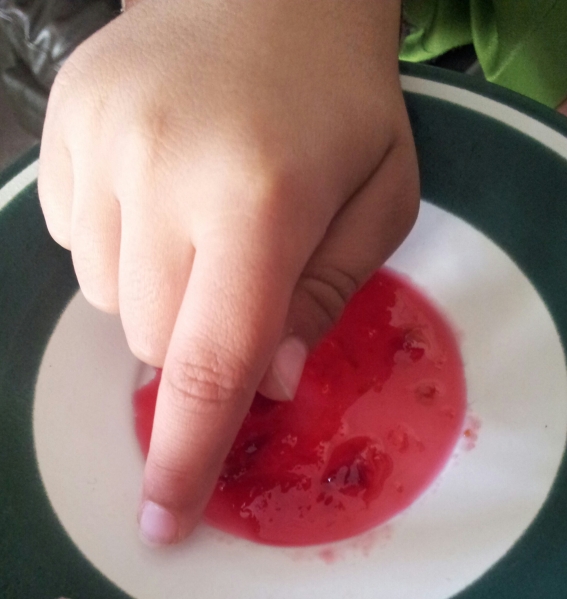
At the beginning of the process I place a couple of saucers in the freezer.  If you put a little bit of jelly onto a very cold surface it will cool down quickly and indicate if setting point has been reached.
20150205_095406-1
Here grandson Beau is learning to check setting point by running his finger through the jam or jelly. If a clear track occurs then setting point has been reached.
I also blow across the jelly surface and if it puckers up like a skin forming then it is likely it will set.
Another indicator is the jam spoon that you use to stir the jelly.  Is there a sign of setting jelly on the spoon?
20150403_105032
It has reached setting point, so I add a knob of butter to assist in dissolving the foam.  Some scoop this foam off with a saucer, but I think too much jelly is lost doing that.
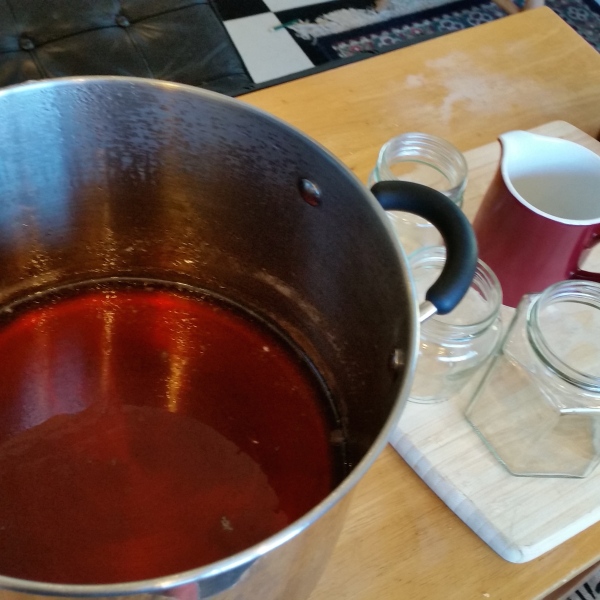
I carefully place the hot jam onto a wooden board , with jars and a jug that has been pre-warmed.
The jelly jars have been washed and placed into an oven at around 150 degrees Celsius for at least half an hour to sterilise them.  It's important also to have the jars hot when adding the very hot liquid jelly to avoid the jars cracking. I tend to use recycled jars with screw top lids.  These lids are sterilised in boiling water for 10 minutes.
20150519_131954
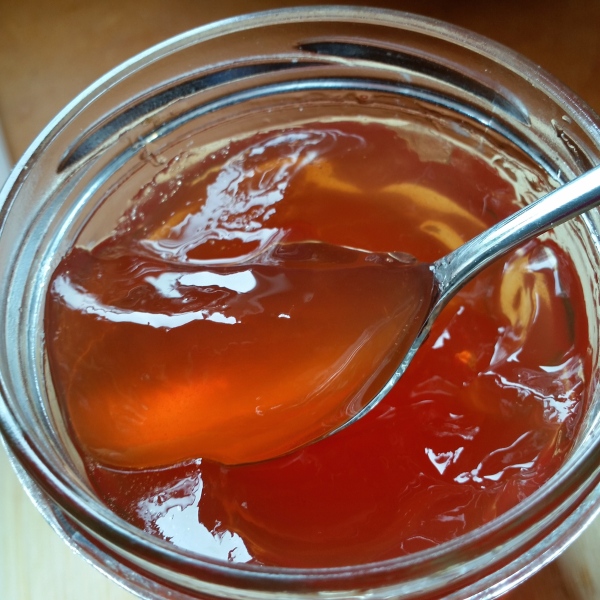
A perfect crabapple lightly set jelly.
Not all jellies turn out perfectly like this crabapple jelly.  Sometimes they can be a little too stiff rather like the description of British jam making written by Nigel Slater in "Eating for England",
"The rest of Europe makes jam that slides sexily off the mound of clotted cream and dribbles down the edge of the scone (an exquisite moment if ever there was one). ..We make jam a little bit like ourselves. A jam that is a bit uptight and reserved, a preserve that wobbles tautly rather than falls off the spoon with a slow, passionate sigh."
20150523_102556
I have also had the odd jelly that has refused to set.  To avoid this happening again I've had to understand the chemistry involved in creating a jelly.  Three elements have to work together - pectin, acid and sugar. Sugar separates the water and pectin molecules. Pectin molecules are the gel of the jelly but alone are negatively charged so they won't work together until positively charged acid comes along.  Cooking apples, crabapples, currants, gooseberries, japonicas, sour cherries, citrus, and sour plums like Damson are all fruits high in pectin and acidity. Jellies or jams made from these fruits will set quickly and you can use a lower ratio of sugar with these fruits...but because of the tartness of these fruits, you need to make your sugar proportion decision on taste as well.
Quince jelly is loved for its jewel-like quality and is an excellent provider of pectin. But it's low in acidity so to ensure quince jelly sets add extra acid in form of lemon juice or add a couple of sour cooking apples to your quinces when boiling up the cut up fruit.
Apricots, strawberries, raspberries, rhubarb, sweet cherries, pears, medlars and elderberries are lower in pectin and acidity, so these fruits need help.  Either you have to marry them with one of the high pectin fruits e.g. gooseberry with rhubarb, redcurrant with strawberry/raspberry, apple with elderberries.  Or you can buy  jam making sugar that has added pectin and acid. Never use jam making sugar for fruits high in pectin and acid....unless you want the sort of jelly that won't fall out of the jar when upended. These low pectin and low acid fruits on their own need a higher ratio of sugar.
20150420_142016
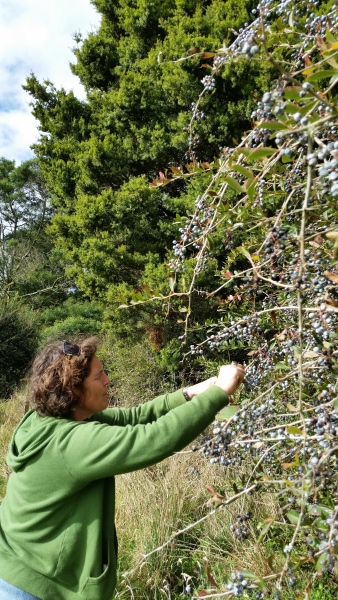
My classmate Sinead helped me to pick Barberries...carefully.
In April I foraged barberries while on a field trip to Chaos Springs on the beautiful Coromandel Peninsula. While admiring the long windrows of organic compost with our organic horticulture class, I spied a hedgerow in the background covered in fruit. I asked Steve, the owner, what were these trees? He replied the hedgerows were established long before he took over the farm and said they were barberries Berberis. I Googled (as you do) and discovered barberries have good nutritional benefits and can be used for making jelly.  Steve was happy for me to harvest, warning me that they have vicious thorns.
I was a little uncertain about the amount of pectin in barberries so used the last of the quinces stored in the fridge.  Once fruit gets really ripe the amount of pectin reduces, and as both the quince and the barberries were quite ripe, my jelly while tasting delicious didn't really set.
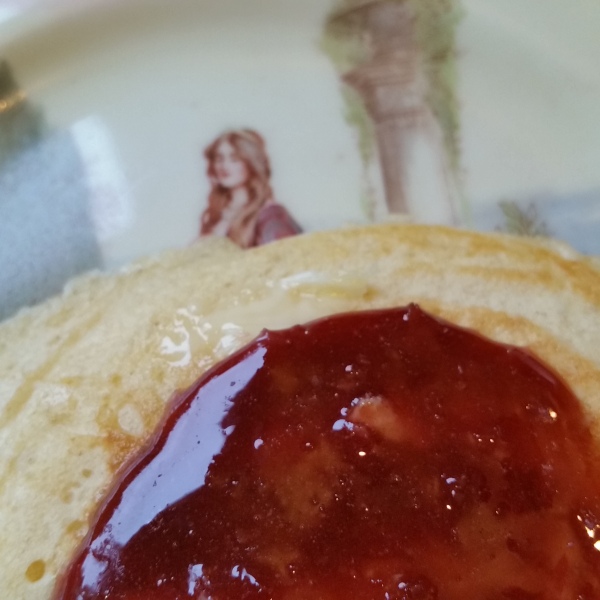
20150818_160915
Barberry and Quince Jelly is showing signs of low acid content with sugar crystals appearing just after 4 months.
Another sign of a not so perfect jelly showed up four months after it was made. The sugar in the jelly started to crystallise which is a telltale sign that there was not enough acid in the jelly.
I have since learnt from reading Pam Corbin that you can do a quick check to see if your fruit has enough pectin.  Cook up some of the fruit and add 1 teaspoon of the cooked fruit juice to 1 Tbsp of whisky, gin or meths.  Shake gently and leave for a minute or two. If the juice forms a firm clot it is high in pectin, if it forms several small clots it has medium pectin and if the juice remains fairly liquid then its low pectin.
Making jelly from frozen fruit also reduces the available pectin.
So what jelly am I planning on making next year?
20150203_132445
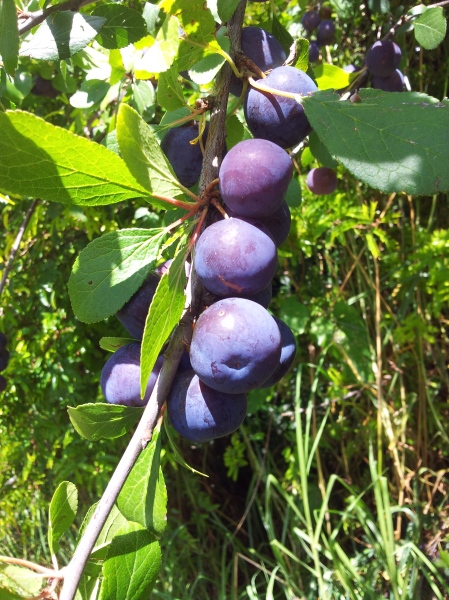
Damson plum Prunus domesticus is a small sour plum  with a blue blush - you have to try and beat the birds because they love them.
In February I had access to some damsons that I made into damson paste but next year I'm planning on making some damson jelly. The colour and rich flavour should make a stunning jelly and its a fruit that is high in both pectin and acid so the chemistry should be right for a perfect set.

Sunday, 16 August 2015

My Curly Endive Favourite - Pizza de la endibia

Curly Endive is a most handsome leafy green vegetable with an expansive rosette of curly edged leaves.  Europeans, especially those from Mediterranean countries,  enjoy endive's slightly bitter flavour, but here in New Zealand it' s not a vegetable easily found in shops. It may be because of its bitter reputation, so for me the only way to try endive is to grow it myself.
20150808_131133
Curly endive in France is often called Frisée and Escarole - although Escarole is a variety that has flatter leaves and look more lettuce like in it's leaf.
The seeds grew easily and by early autumn I had transplanted many seedlings. All through winter I've been harvesting curly endive, using it to create a variety of salads.
20150803_134843
Curly endive makes up the majority of this salad with an egg, avocado, bacon, some mizuna "red coral" and croutons. A great lunch salad.
Lettuce has had to step aside. Endive's robust flavour and not so fragile leaves work well with winter dishes. But the best recipe for endive arrived via one of the gardeners at our Sanctuary Community Garden. Corinne is Spanish and told me how to prepare endive pizza.
20150620_181244#1
This pizza I have made quite a few times for friends, and has been really well received.
It's a little different from a standard pizza and a whole lot healthier. After all endive has only 17 calories per 100grams in weight, but has a high fibre content, plus vitamin A and K.

Pizza de la endibia

Curly endive in Spain is called la endibia so I think this recipe deserves to have its Spanish name, Pizza de la endibia.
Curly endive grows into quite a large head of green leaves so depending on how many pizzas you make, use half or a whole plant. You should prepare the endive before you start rolling out the pizza dough.
20150804_141656
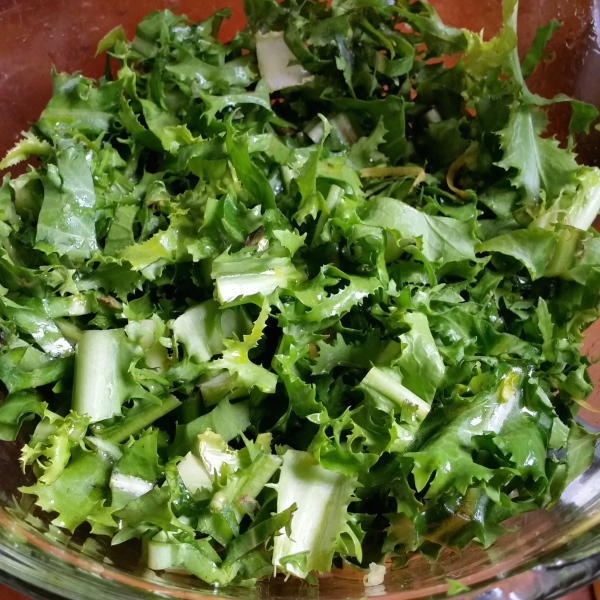
Prepared endive ready for the oven.
I roughly slice the leaves and place into a bowl. Add lemon zest, garlic crushed into salt and then mixed through the leaves using your fingers.  Season with salt and pepper, drizzle over some avocado or olive oil and finish with a good squeeze of lemon juice. Toss as you would a salad.
Finely grate some parmesan ready to sprinkle over the top or if you are lucky enough to have on hand some sliced fresh mozzarella.
The easiest pizza dough recipe I use is from River Cottage Baker Daniel Stevens ( from "River Cottage Handbook No.3: Bread") where he just mixes everything up at once, rather than dissolving the yeast separately. The finished dough will keep in the fridge for up to two weeks and will make up to 8 small pizzas.

Perfect Pizza Dough

250g strong white bread flour
250g plain white flour
5g powdered dried yeast
10g salt
325ml warm water
About 1 tbsp olive oil
1 handful coarse flour (semolina or polenta), for dusting
In a bowl, mix the flours, yeast, salt and water to form a sticky dough. Mix in the oil, then turn out on to a clean work surface and knead until smooth and silky.
20150620_124831
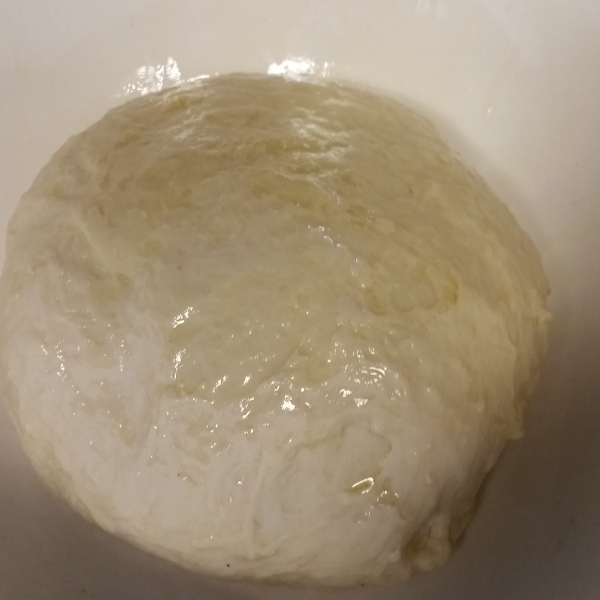
After you have completed your kneading from a sticky mess to an elastic dough sprinkle with a little olive oil, and smear around the bowl to ensure the rising dough doesn't stick to the bowl.
Kneading takes time and the action of kneading ensures your pizza dough has the required elasticity to successfully make it roll out really thinly.   Cooking usually requires your constant attention but making bread dough is a repetitive action for your hands, allowing your mind wander anywhere. So when not pressed for time making bread can be a really relaxing activity. (Alternatively, if you have a mixer with a dough hook, mix the flours, yeast, salt and water on a low speed, add the oil and knead for 10 minutes or make the dough in a bread maker).
20150620_125010
The dough is resting on a sunny bench top at my friend Julia's Matua Lodge in Tauranga. It has one of the best kitchens I have ever worked in with wonderful kitchen window views. Lingering making dough, dreaming this was my kitchen, was very enjoyable.
Shape into a round, and leave to rise in a clean bowl, covered with plastic wrap, and a tea towel on top and kept warm until doubled in size.
20150620_171056
This is the dough now doubled in size and ready to use. If you were not wanting to make pizzas straight away, just punch down the dough and put in the refrigerator until needed. Even in the fridge the dough will slowly rise up.
Preheat the oven (and pizza stone or substitute) as high as it will go. Take a lemon-sized piece of dough and sprinkle the board with polenta or semolina to keep your pizza from sticking to the board and adding extra crunch to your base. Roll it into a 5mm thick round. The aim is to make a very thin pizza base and you get to know what best fits your pizza stone.
As Hugh Fearnley-Whittingstall from River Cottage explains a good pizza base is hard to accomplish in a domestic oven, "And I won't lie – it can be tricky getting that crisp, slightly blistered crust in a domestic oven. The key is to whack the thing up as high as it will go and give it time to get to temperature. If you have one, put in a pizza stone to heat up too. If you haven't, a large, unglazed quarry tile (terracotta unglazed tile) is a good substitute, or at a pinch use a heavy baking sheet, preheated as hot as it will get."
20150620_180140
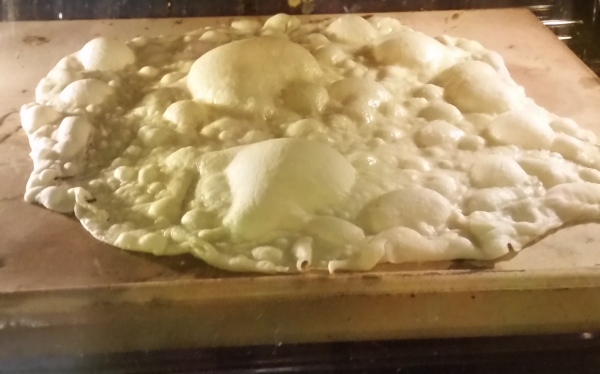
Julia's oven went really hot which ensured the bread had plenty of bubbles and went really crisp.
Usually with pizza you put the base onto a tray, add the toppings and slip the pizza onto the hot stone just brought out of the oven. The aim is to do this as quickly as possible so as not to allow the stone or tray to cool down too much.
However, this recipe nearly completely cooks the base before adding the curly endive topping. I usually add a slathering of oil and a sprinkle of either fennel seeds or thyme leaves.
2015-08-09 17.41.31
The leaves are added to the nearly cooked base.
Then sprinkle with parmesan or place mozzarella slices.  Feta also works well.
You don't have to wait long for this to cook at such a high temperature.  You just want the endive to wilt.
2015-08-04 21.56.22
Here it is as the finished item.
Curly endive Cichorium endivia is from the Chicory family and while it is related it's not the same plant as the distinctive blue flowered chicory that you can find growing on roadsides, or the cultivated chicory shoots that are also called endive or Belgium endive or witloof.
20150525_135849#1
Chicory Cichorium intybus is a relation to curly endive but is grown for it's root not the leaves like curly endive.
Curly endive is from the same tribe of plants as dandelion, and their common trait is their bitter tasting leaves.  To reduce some of the bitterness of endive it has traditionally been "blanched" while growing ...meaning covered with a pot or tying up the outer leaves to create pale leaves in the centre.
20150628_132548
My attempt at blanching curly endive
When I tried this with my endive, they did look quite hard case with their curly leaves all tied up. The centres did go a pale yellow but it also became a really nice home for every slug and snail in the garden and some of the leaves started to rot.  I'm not sure if the Auckland warmer climate has helped but the leaves don't seem to be that bitter anyway, so next year I won't bother doing the blanching.
20150725_112705#1
The washed leaves from a curly endive that has been "blanched". It shows the contrast between inner and outer leaves.
To counter any bitterness in curly endive leaves I tend to add some sweet winter fruit like mandarins and pears to my endive salads. Shaved bulb fennel is also a perfect salad companion for curly endive.
20150809_182643#1
This endive salad has thinly sliced pear, a mandarin and shaved fennel bulb in a dressing of lemon juice, balsamic vinegar and olive oil. Nuts like walnut or hazelnut would be a good addition.
I am pleased that I got to know Curly Endive and will certainly grow it again next year.
Postscript:
I made Pizza de la endibia a couple of days ago but this time added a taste of sweet with a pear sliced on top of the endive...and it was a winning combination that I would like to pass on to you.
20150811_200104
Pizza de la endibia with sliced pears, parmesan and pepper.

Wednesday, 3 June 2015

Kefir - my new pet

I do have a reason for not posting for a while. I’ve been busy getting to know and experiment with a new food called kefir. I now feel confident after working with it on a daily basis (and even travelling with it) for nearly six months to pass on to you my discoveries about kefir.
20150204_102649-2
You will have to forgive the bland photography in this post but it’s hard to make a white liquid look colourful. Here is my jar of kefir at the start of the fermenting process.
Looking after kefir is a little like having a pet. It can’t be left alone for too long and needs regular feeding. It’s quite easy to become a little obsessed about it.
My kefir story starts in December 2014 when I mentioned to my friend Sue that I wanted to introduce more fermented food into our diet.  We talked about how foods that have undergone a fermenting process will improve gut health… and it’s widely recognised that the gut plays a vital role in general health.  Sue suggested Kefir as a good starting point and next time we met, she gave me some Kefir milk grains.  I gladly accepted these grains knowing absolutely nothing about Kefir, but willing to learn.
20150419_095126
Here is kefir after fermentation. It looks just like a pouring yoghurt.
Kefir (pronounced keh-fear) is a yoghurt like fermented milk product which comprises a mix of probiotic bacteria and yeasts.  Unlike yoghurt, kefir has a slight effervescence, which comes from these ‘good guy bugs’ doing fermenting work.  In fact the biggest difference between the taste of natural yoghurt and kefir is the slight yeasty smell and taste. I don’t mind the yeasty flavour at all… because I know that these kefir yeasts are ‘friendly’ and wage war on any harmful yeasts hanging out in my gut.
20150428_113937-1
I can now easily drink kefir straight, but until you get used to the sourness I suggest you add some sweetener like maple syrup or a dash of cordial. It doesn’t take long to just enjoy it straight.
The fundamental difference between yoghurt and kefir is that yoghurt is made up of up of a handful of good bacteria that feed the good bacteria in your digestive tract.  But, they are only transient and their benefits will only last 24 hours.  Kefir has a mix of transient and colonising good bacteria and yeasts (or probiotics) that continue to keep working in your gut fighting bad bacteria (pathogens), especially in the bowel. The longer you ferment kefir the more astringent and thick it becomes and it will have more probiotics present.
20150310_085732
This is a blackcurrant, honey and banana oat smoothie using kefir and some rolled oats soaked overnight. I use whatever fruit I have and with the oats you have a breakfast in a drink. It’s also the best way to get my Grandson Beau to drink kefir.
At first I couldn’t easily drink a glass of kefir straight so my first kefir experience was in a kefir smoothie… it was delicious!
Kefir was has been used for well over 2000 years.   Marco Polo wrote about it as being part of the diet of the people in the Caucasus mountain region that separates Europe from Asia. Kefir grains were a safe way of preserving milk before refrigeration.  It preserved milk by the introduction of 30-60 different probiotic bacteria and it was said those who drank it twice a day lived long, disease free lives. You wonder why it has taken so long for the good news about Kefir’s magical health properties to reach beyond Northern Europe, Russia and Eurasia. Apparently Kefir was only introduced to the United States by Russia at the end of the Cold War.
20150419_094010#1
I cover my jar with some cheese cloth and secure it with a rubber band.
Unlike yoghurt you don’t need an even heat for the fermentation process.  Kefir fermentation is done on the bench top out of the sun. Ideally cover it with a cheesecloth to keep out stray insects… rather than cover with a lid as it’s fermenting gases will accumulate. In the heat of summer I was making kefir in less than 24 hours but now in winter it can take two days.  
20150419_095224
Kefir is like a sour dough starter or ginger beer bug – once you receive the grains it needs to be fed with fresh milk to survive.
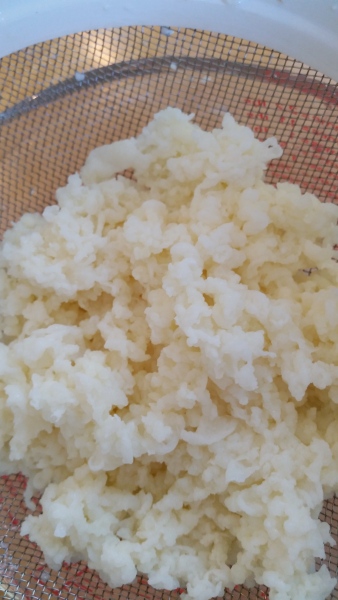
Kefir grains look a bit like rice pudding or cauliflower and the best way to obtain them is from a kefir making friend.  Anyone who is making kefir,  will have an embarrassment of kefir grains after just a couple of weeks of fermenting.  If you don’t know of anyone who can pass them on free then you can find them online in New Zealand at Natural Abundance. Their site has plenty of good information and follow their instructions carefully to activate the grains.
20150419_095604
Kefir grains are fascinating. I unfurled one of the grains to discover they stretch out flat. Some grains can get quite large.
The method I describe below is using activated kefir grains that you might receive from a friend already in a jar with some milk. For each daily ferment, I use about 1 Tbsp of grains to about two cups of milk. This is a lower ratio than some others suggest but I try to avoid the fermentation from being too rapid because I can easily get an oversupply of Kefir.
2015-05-10 16.30.10
This is the amount of grains I use to about 2 cups of milk.
I use a one litre preserving jar that I fill to just over half way. The good news is you don’t have to be that fussy with measurements when it comes to kefir. As they ferment they increase in volume so it’s good to give kefir a bit of elbow room. I use whole milk as it produces a thicker kefir but any type of milk is fine except for lactose-free milk.  The ideal is organic whole milk and you can use goat or sheep milk as well. The kefir feeds on the lactose in milk.. which is good news for anyone who is lactose sensitive or intolerant, in fact for any of us, as lactose can be difficult to digest.
So, here we go.  This brew has just begun fermenting.
20150204_102649-2
You can see the top of the milk just starting to solidify.
After 12 hours or so, you will begin to see air spaces in the fermenting milk.  This increases until the fermentation is complete, after about 16-24 hours  and looks like the picture below.
20150511_201825
There will be separation occuring but not enough for the whey to be separated from the curds as below.
20150419_092033
There is nothing wrong if your kefir does have separation like above, it will just be less creamy and taste tart. The tartness also indicates that the kefir has eaten more of the milk sugars, so those with a lactose intolerance wanting to try kefir should wait until the whey separates like this before consuming.
20150419_092223
I am using a stainless steel sieve. It’s supposed to be a “no no” to use metal with kefir grains but this rule was made at a time when metals were reactive and there would be a chemical reaction when the two met. Stainless steel is non reactive. I haven’t found my kefir suffering at all with the use of my  sieve.
Now that your kefir has begun to separate, its time to separate the grains from the thickened fermented milk. Tip out the contents of your jar into a sieve over top of a glass bowl and gently use a non metal spatula or spoon to gently separate the liquid from the grains.  What is in the bowl is now processed Kefir and can used right away.
If you want your Kefir with more effervescence and maximum goodness then you can give it a second ferment.  This means just leaving the strained kefir out on the bench top for another 6 to 12 hours.  This second ferment is not necessary – it’s optional.
Donna Schwenk’s Cultured Food Life video is well worth looking at for extra information and other processes using kefir grains.  Donna has quite a few videos on You Tube and if you have food allergies you might like to listen to her story on how her family got rid of allergies through eating fermented or cultured food.

20150204_102250-1
On the left is the kefir cream, centre the whey and right, the kefir grains ready to have more milk added and another fermentation.
Sometimes I want the curds and whey separated so that I can easily drain off the whey and kept in a bottle in the fridge. Whey can have a number of uses in the kitchen and garden…but that’s another story. The remaining solid can then be sieved to remove the grains and what remains is what I call kefir cream – the consistency of sour cream or thick Greek yoghurt. The cream is easier to work with if I wanted to make a kefir dressing.
20141227_144558#2
This dressing is excellent for potato salad. You can use the thinner pouring kefir as well but just add a tsp of tahini and leave to thicken before using.

When you are away from home your kefir is happy to chill for up to two weeks in your fridge.
If you are away for more than one week you should give it plenty of milk to feed on. Kefir slows down in the cold and once you are home just pop it out on the bench and it will start to activate again.
Another magic feature of kefir is that it can improve your baking.  Use kefir where you would use buttermilk in recipes. I used kefir instead of buttermilk in Yotam Ottolenghi’s Skillet Cornbread recipe.
20150128_184437
There is a lightness in baking made with kefir so I use it in any recipes that have milk in them. I have tried it with my favourite recipes for sconesoat pancakes and Nan’s pikelets.

2015-05-23 22.32.05
Nan’s pickles were lighter in texture using kefir instead of milk. Topped with my St Mary’s Crabapple Jelly.

A delightful advocate of kefir on You Tube is Katrine Rudolph from Denmark. Katrine milks her own Jersey cow and makes her kefir from raw milk.
Kefir once discovered is something many want to share on You Tube videos. I, too have been most enthusiastic about my new pet subject kefir… perhaps telling friends and family more than they really want to know.
For me kefir has been a wonderful start in my journey to discover more about fermented food.

 This posting has been copied from my new site: Jeannieskitchen.me

Preserving a dying art ..Augustines of Central

Preserving a dying art | Otago Daily Times Online News : Otago, South Island, New Zealand & International News